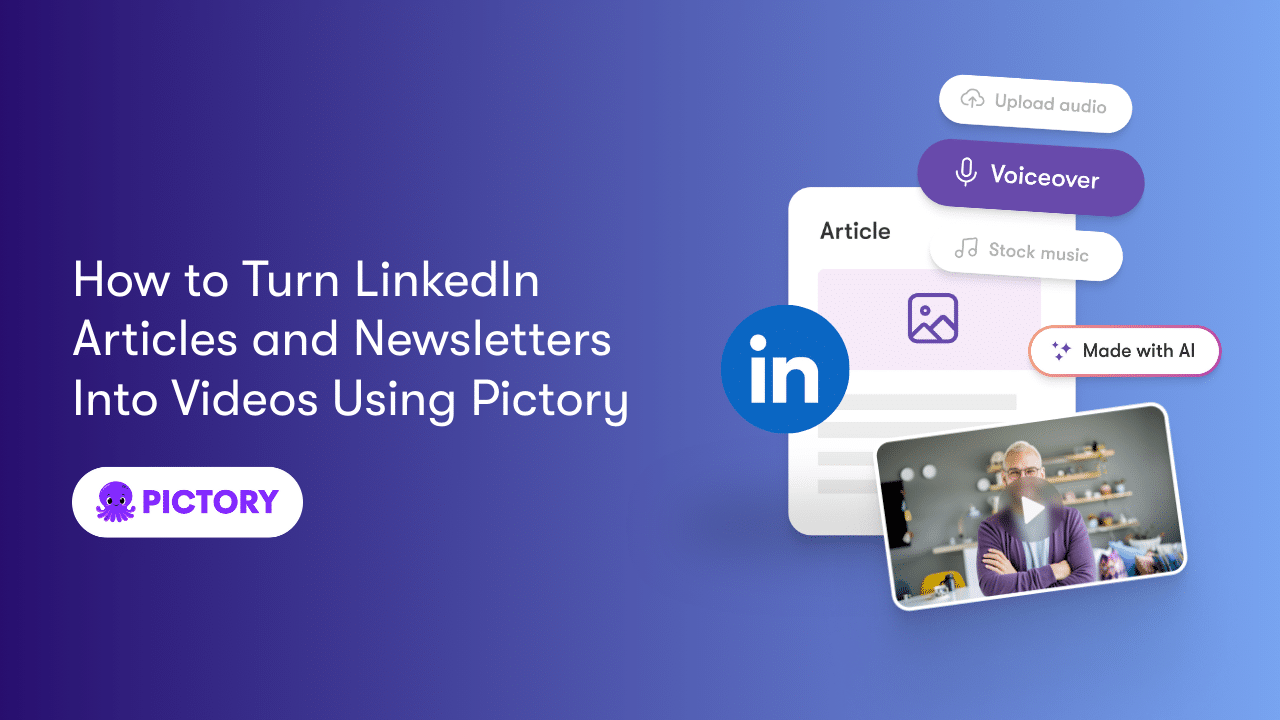
Written content like LinkedIn articles and newsletters already contains strong ideas, structure, and messaging. Instead of rewriting everything from scratch, you can turn that content directly into video using Pictory.
This quick guide walks through a simple AI workflow to convert a LinkedIn article or newsletter into a polished video using URL to Video, AI Studio visuals, AI avatars, and a voice of your choice.
Step 1: Start With URL to Video
If your content lives online, such as a LinkedIn article or a published newsletter, the fastest way to begin is with URL to Video.
Workflow:
- Open Pictory and choose URL to Video
- Paste the link to your LinkedIn article or newsletter
- Select your video type and preferred length
- Generate the script
Pictory automatically extracts the key content and creates a draft script that matches the structure of your article.

This saves time and keeps your video aligned with the original message.
Step 2: Review and Edit the Script
Once the script is generated:
- Remove any unnecessary text
- Shorten long paragraphs
- Focus each scene on one clear idea
For LinkedIn articles and newsletters, shorter scenes work better. Aim for clarity rather than completeness.
When the script looks good, generate the video to move into the editor.

Step 3: Use AI Studio to Create or Animate Visuals
Inside the editor, you can enhance each scene using AI Studio.
You can:
- Generate AI images from the scene text
- Animate images you upload yourself
- Create visuals that match the idea being explained
This is especially useful when your article is text-heavy and needs visual support.
AI Studio lets you turn abstract ideas into visual scenes without searching for stock media.

Step 4: Add an AI Avatar
To make the video feel more personal and presenter-led, add an AI avatar.
Workflow:
- Open the Avatars tab
- Choose an avatar that fits your tone
- Place and resize the avatar in the scene
- Apply the avatar to all scenes or only key sections
Avatars are ideal for:
- Introducing the topic
- Explaining key points
- Closing the video
You can show or hide the avatar per scene depending on the content.
Step 5: Choose a Voice for Narration
Each avatar uses an AI voice to narrate the script.
You can:
- Keep the default voice
- Preview other voices
- Select a voice that matches your style
- Apply it across the entire video
The voice follows the scene text automatically, so updates are easy if the script changes.
Step 6: Preview and Export
Before exporting:
- Preview the video
- Check avatar placement
- Confirm visuals and pacing
- Make sure the narration sounds natural
When ready, download the video. Lip sync for avatars is applied automatically during export.
Why This Workflow Works Well
This approach is effective because:
- You reuse content you already wrote
- You avoid rewriting scripts from scratch
- You create video without recording yourself
- You can update videos by editing text
- One article can become multiple video formats
It is a simple, repeatable system for turning written ideas into video.
What to Do Next
Once your video is created, you can:
- Publish the full version on YouTube
- Cut short clips for LinkedIn and social
- Use the same workflow for future articles
- Build a consistent content pipeline using Pictory
This is one of the fastest ways to move from written content to scalable video without adding production complexity.