Want to learn how to edit videos like a pro? This guide will show you how to edit from start to finish using Pictory AI. You’ll master importing clips, trimming footage, adding visual and audio effects, and exporting your final product. Let’s dive into the world of video editing and create something amazing.
Key Takeaways
-
-
Pictory AI simplifies video editing for users of all experience levels, providing intuitive tools for creating professional-quality content.
-
-
-
Organizing media files and understanding editing software layout is crucial for an efficient editing process, enabling smoother workflow and better project management.
-
-
-
Incorporating advanced tools such as audio enhancements, visual effects, and transitions enriches the video’s aesthetic appeal and viewer engagement.
-
How to Edit Videos Like a Pro: A Simple Guide

Editing videos can often feel like the longest and most challenging part of video production. It’s a process that requires patience, creativity, and an eye for detail. However, having a clear plan and being organized before you start filming can significantly improve your editing experience. This guide aims to simplify the editing process, providing you with step-by-step instructions and tips to edit videos like a professional.
Understanding the basic functions of video editing software is crucial to create high-quality content. Pictory AI, a powerful platform designed for content marketers, offers an intuitive interface that makes video creation accessible to everyone, regardless of experience level. Whether you’re editing YouTube videos or crafting a corporate presentation, mastering the use of editing tools can elevate your video content.
Color grading, adding transitions, and using visual effects are just a few of the advanced editing tools available to enhance your videos. This guide will teach you how to use these tools to produce engaging and professional-looking videos. Let’s start editing like a pro!
Introduction
In the past, video editing was a skill reserved for professionals with access to expensive equipment and extensive training. Today, the landscape has changed dramatically. With the advent of user-friendly video editing software, anyone can edit video and create high-quality videos without prior experience. This democratization of video editing means that more people can connect with their audiences and convey their messages effectively.
This guide will help you navigate the world of video editing, equipping you with the necessary tools and knowledge. From importing media files to adding visual effects and transitions, you’ll learn how to create compelling video content that captivates your audience.
Whether you’re new to editing or seeking to refine your skills, this guide will help you create stunning videos.
Getting Started with Video Editing Software
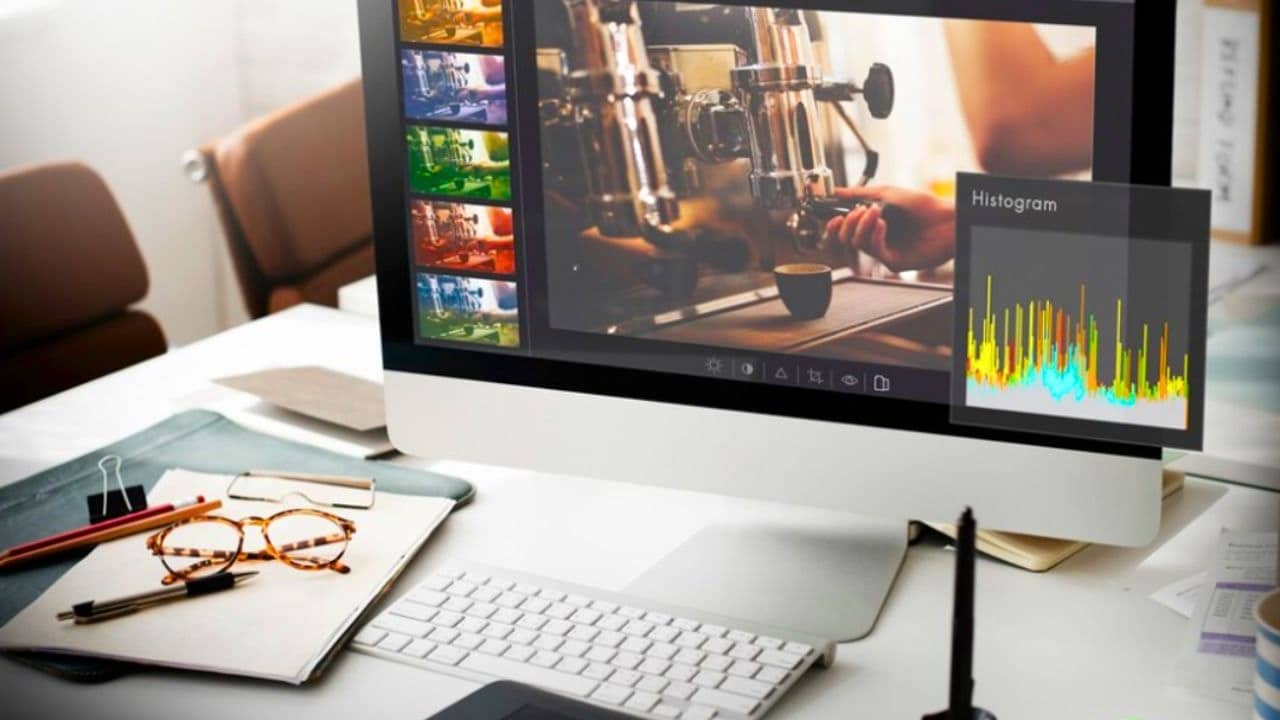
Choosing the right video editing software is a crucial first step in the process, significantly impacting your editing experience. Look for software that offers a user-friendly interface and a range of editing features to suit your needs. Understanding the basic functions of your chosen software is crucial for effective video creation.
After selecting your software, begin by importing your video footage into the editor. Planning and organizing before filming can greatly enhance your editing experience. Use establishing shots to provide context for each scene. These initial steps will set the foundation for a smooth editing process.
As you familiarize yourself with the editing tools, you’ll find that color grading can enhance the mood and tone of your video. However, it’s essential to use this feature carefully to maintain the video’s overall aesthetic. Armed with the right software and a clear plan, you’ll be ready to edit videos like a pro.
Importing and Organizing Your Media Files with Pictory
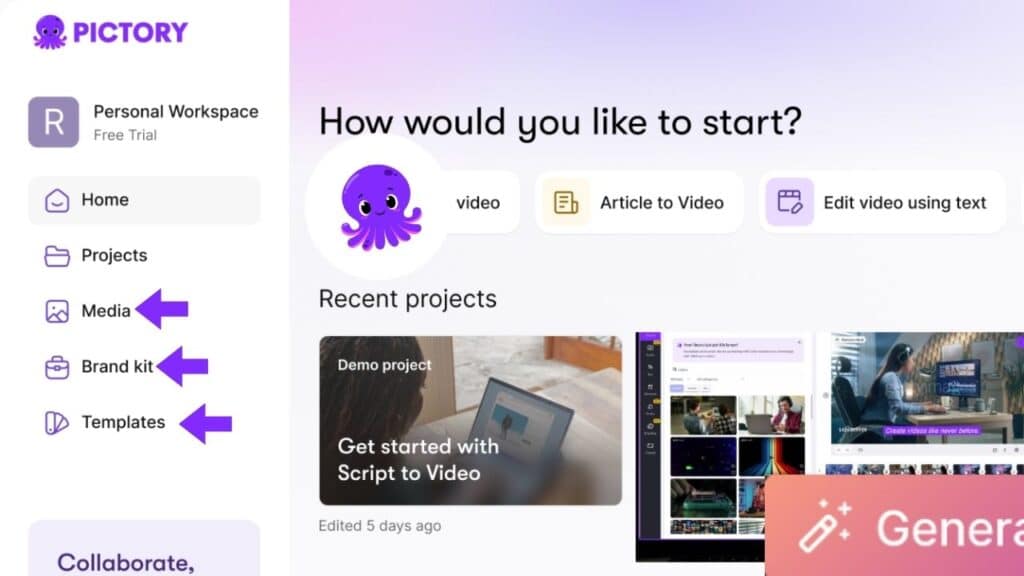
The initial step in any video editing project is importing your media files. Pictory makes this process simple and efficient. You can drag media files directly from a folder into the Project panel, which is a quick way to get started. Alternatively, you can use the File > Import option to bring in media files from your computer. Starting with organized footage will save you time and effort during the editing phase.
After importing your media files, organizing them is crucial for efficiency. The media library in Pictory houses all your project’s assets, including video clips, images, and audio files. Pre-arranging your media files in well-named folders can significantly reduce search time later.
Additionally, backing up your media files in multiple locations ensures data safety and prevents loss.
Understanding the Editor Layout
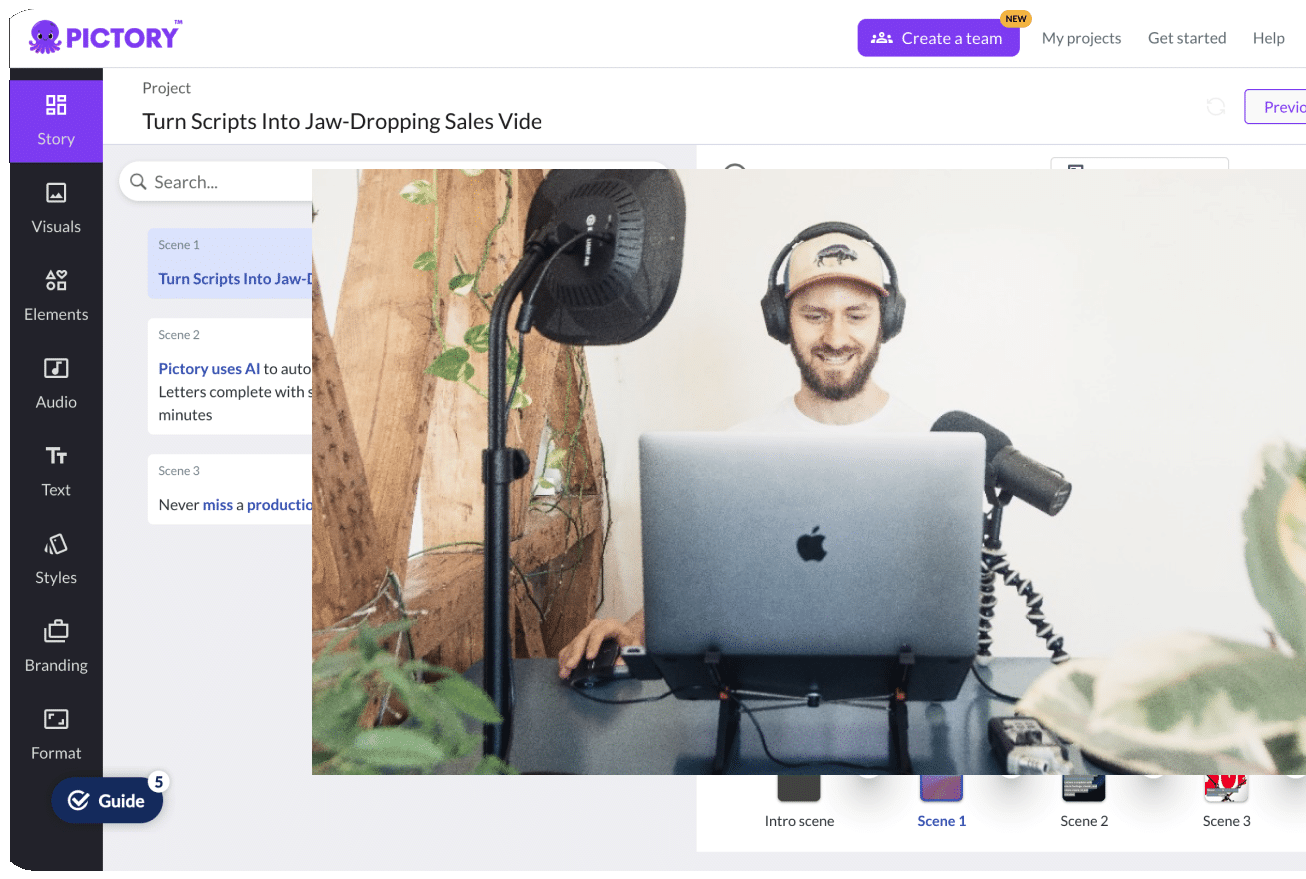
The editor layout is the command center for your video editing projects. The timeline is where you’ll arrange your clips, set in and out points, and perform precise edits. The Project panel is designed for organizing your assets effectively, featuring options to create bins similar to folders. Bins can store various items, including sequences and media files, facilitating better project management.
The Properties panel provides detailed information about each clip, such as duration and codecs, aiding in quality assessment. Label colors within the Project panel help identify and categorize assets quickly, improving workflow efficiency. Grasping these components and their functions will streamline your editing process.
Basic Editing Techniques

Basic editing techniques form the foundation of creating professional-looking videos. Start by making large cuts to your clips, such as trimming the first two minutes. This initial step helps you focus on the essential parts of your footage. Trimming and splitting tools are essential for removing unnecessary parts of a video. These tools allow you to keep only the best footage, ensuring a concise and engaging final product.
Trimming involves adjusting the start and end points of a clip to remove unwanted sections. Splitting a video clip allows you to cut one clip into two or more parts, enabling more precise editing. These techniques streamline the editing process and help create a cohesive narrative.
After mastering these basics, you’ll be ready to explore more advanced editing tools.
Trimming Unnecessary Footage
Removing unnecessary footage is crucial in the editing process. It involves adjusting the start and end points of a clip to remove any unwanted sections. Collecting extra footage during filming, known as coverage, provides more options during the editing phase. This practice ensures that you have enough material to work with, allowing for a more flexible and creative editing process.
In various editing software, the trimming process can differ slightly. For instance, in Clipchamp, you can tap edit an asset by clicking on it to highlight it and then dragging the sidebars. The Photos app on an iPhone allows you to trim videos. This feature makes it easy to edit your video clips.
No matter the software, the goal is to keep only the best parts of your footage, making your video more engaging and professional.
Splitting and Merging Clips
Splitting and merging clips are fundamental techniques in video editing. Splitting a clip involves cutting it into two or more parts, allowing for more precise edits. To split a clip, position the playhead at the desired cut point and use a dedicated split button or shortcut. This technique is useful for isolating specific sections of your footage that you want to focus on or remove.
Merging clips, on the other hand, involves placing them on the same track in the timeline, allowing them to join seamlessly without transitions. This technique is particularly useful for creating a smooth and continuous narrative.
After splitting and merging your clips, review your edits to ensure they contribute to a cohesive and engaging final product.
Enhancing Audio in Your Videos
High-quality audio is essential for creating engaging videos. Poor audio quality can detract from the viewer’s experience, no matter how visually appealing your video is. Start by ensuring that your audio tracks are clear and free of background noise. AI tools can be employed to automatically eliminate background noise, improving the overall audio quality.
Sound effects and background music can enrich the mood and tone of your video. Stock audio libraries offer a wide range of options to find the right background music quickly. Using fades can also improve the audio experience by gradually increasing or decreasing sound levels, creating a more professional and polished final product.
Adding Visual Effects and Transitions
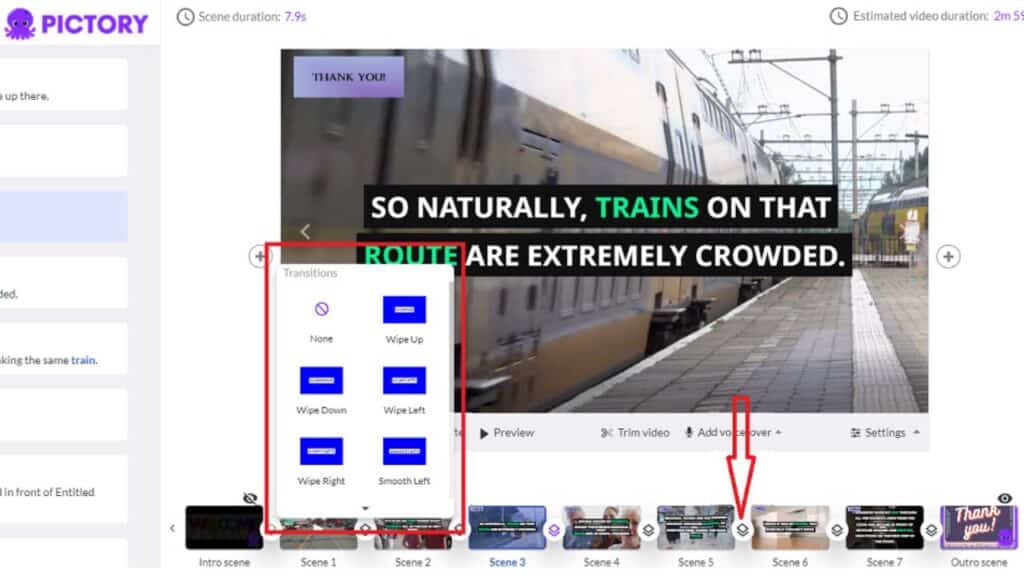
Visual effects and transitions can significantly enhance the aesthetic appeal of your video, making it more engaging and professional. Adding visual effects can be as simple as dragging them onto a clip in the editing sequence. Use effects like improving brightness and contrast to enhance the visual appeal of your video, bringing out essential details.
Keyframing allows you to create movement and transitions in your videos by setting specific points in time. This technique can help emphasize important content and facilitate smooth transitions between scenes. Common transitions include cross-dissolve for video and crossfade for audio, which can be adjusted in terms of timing and duration by dragging them in the timeline.
Adding sound effects during transitions can further elevate viewer engagement.
Using Filters and Overlays
Filters and overlays are powerful tools for customizing your video visuals. Filters are visual layers that create artistic effects, adding a unique touch to your footage. Edit overlays by tapping Overlay at the bottom of the editing screen. You can change the position of an overlay by holding and dragging it to the desired location.
Annotations, another form of overlays, can enhance video accessibility by highlighting important parts and ensuring that viewers don’t miss crucial messages. Using annotations along with filters can significantly enhance the visual appeal and engagement of your video.
To locate visual effects, switch to the Effects workspace in your editing software.
Adding Transitions Between Clips
Adding transitions between clips helps create a smooth and seamless viewing experience. An easy method to apply transitions is through drag and drop transitions from the Effects panel to the edit point between clips. Use the transition panel/library to drag and drop transitions between clips.
Transitions can also be used with annotations or other images on-screen, enhancing the overall video experience. Common transitions like fade-in and fade-out help create a professional look and feel for your video. Replacing a transition is as simple as dragging a new effect over an existing one.
Incorporating Text and Graphics
Incorporating text and graphics into your videos can significantly enhance viewer engagement, especially when conveying key messages. Text overlays are particularly useful for viewers who watch videos without sound. To ensure that your text is effective, keep word counts low and display text long enough for viewers to read without feeling rushed.
Using bold and colorful text helps capture attention and makes your content visually appealing. Aligning text design with your branding enhances the overall identity of your video content.
Additionally, introducing movement to text can help maintain viewer interest and attention throughout the video.
Fine-Tuning Your Edits
Fine-tuning your edits is the final step in the video editing process. Color grading is essential for enhancing the visual aesthetics of your video. By adjusting colors and tones, you can convey different moods and enhance the storytelling of your video. Pacing is another crucial element that can influence the intensity and perception of a scene.
After completing your edits, it’s important to watch the entire video from start to finish to identify any necessary adjustments. Reducing noise and grain through selective noise reduction techniques can lead to a cleaner final product. Employing blur can help direct viewer focus to key elements or subjects within your footage, enhancing narrative clarity.
Exporting Your Final Video
Exporting your final video is a crucial step that ensures your work is ready for viewing on various platforms. The export settings should match the requirements of the platform where the video will be uploaded. Choosing the right export format is essential for ensuring your video plays back correctly on targeted platforms. Common export formats include H.264, known for high-quality video compression.
Optimizing compression settings helps maintain video quality while reducing video file size, enabling smoother playback and easier sharing. Many editing applications offer a Quick Export feature that simplifies the video export process.
Additionally, you can adjust the scaling settings to fit your source video within the output frame during export. Once exported, you can share your video directly to platforms like YouTube or export it locally for further use.
Advanced Editing Tools and Techniques

Advanced editing tools and techniques can take your videos to the next level. J and L cuts, for example, require a separate track video editor to adjust audio without affecting video. These techniques allow for smoother transitions and more dynamic storytelling. Another advanced feature is Scale to Fit, which helps Windows users create dynamic content flow in their videos. Video editors can greatly benefit from these features.
Animations can be used to highlight specific parts or create dynamic transitions, increasing engagement and understanding. The Magic tool in editing speeds up the editing process by auto-editing core video features.
To use the Magic tool, go to the editing tool, tap Magic, select an editing style, preview the clip, and save edits. These advanced tools and techniques enable you to create highly polished and professional videos.
Editing Videos for Social Media Platforms
Editing videos for social media platforms requires a different approach compared to other types of video editing. A compelling hook at the beginning of a video can significantly reduce viewer drop-off rates. Keeping videos concise is essential, as shorter videos tend to have higher viewer retention. High-quality visuals enhance engagement and are often prioritized by social media algorithms.
Incorporating music and sound effects can boost the appeal of social media videos. Adding captions makes videos more accessible and helps convey messages to viewers without sound.
TikTok videos can be easily edited using the TikTok app or Camtasia. Utilize simple cuts or fades for transitions to prevent overwhelming the viewer. Following these tips will help you create engaging content for platforms like TikTok and Instagram.
Using AI to Speed Up Editing

AI technology has revolutionized the video editing process, making it faster and more efficient. Pictory is a powerful platform that offers easy video creation services for content marketers. It enables rapid video creation by allowing users to generate multiple videos efficiently through its AI capabilities. It automatically generates subtitles and captions, enhancing video accessibility and SEO.
Pictory also provides AI voiceover generation, creating voiceovers in various languages and accents. It can automatically extract highlights from long-form videos and turn them into short branded video snippets suitable for social media.
The user-friendly drag-and-drop interface makes Pictory accessible for users of all skill levels. By leveraging AI, you can speed up the editing process and produce high-quality videos in less time.
Collaboration Features in Video Editing
Collaboration features in video editing are essential for enhancing teamwork and efficiency during the editing process. Creative Cloud Libraries enable teams to share logos, graphics, and colors, ensuring a consistent brand presence across projects. Pictory’s Teams Plan allows colleagues from all company departments and external suppliers to share assets and ideas.
Integrating third-party applications lets video editing teams tailor workflows to their specific project needs. Utilizing these collaboration features leads to improved creativity and productivity, making the editing process smoother for all team members.
Effective collaboration ensures that everyone involved in the project is on the same page, resulting in a more cohesive and polished final product.

Summary
Editing videos like a pro involves mastering a range of techniques and tools, from basic trimming and splitting to advanced effects and transitions. A clear plan and organization before you start editing can significantly enhance your workflow and final product. Using platforms like Pictory AI makes the editing process more accessible and efficient, allowing even beginners to create high-quality videos.
By following the steps outlined in this guide, you’ll be well on your way to creating engaging and professional-looking video content. Remember to keep your audience in mind, use high-quality visuals and audio, and don’t be afraid to experiment with advanced tools and techniques. The world of video editing is at your fingertips, so go ahead and create something amazing.
Frequently Asked Questions
Pictory is designed for easy video creation, particularly for content marketers looking to enhance their digital presence. It streamlines the process of producing engaging video content.
Pictory offers the feature of automatically extracting highlights from long-form videos and transforming them into short branded video snippets, making it easier to share on social media. This functionality is especially useful for content from platforms like Zoom, Teams, and Podcasts.
Pictory enhances blog posts by converting them into engaging videos, which boosts SEO and lowers bounce rates. This visual element can significantly increase reader engagement and retention.
The primary feature of Pictory is its ability to leverage AI to help users create highly engaging videos in minutes, eliminating the need for prior video editing experience.

