Most blog posts get published once. After the first day of traffic they stop earning reach, even the well-researched ones. Pictory’s URL to Video workflow changes that: paste your blog link, and the AI builds a scripted, branded, captioned video ready for YouTube, LinkedIn, and social in under 15 minutes. Your post is already written. This guide shows how to turn it into video and where to publish each output.
TL;DR
Paste any blog URL into Pictory’s URL to Video workflow and the AI extracts the content, builds a script, matches stock visuals to each scene, adds captions and a voiceover, and lets you export for YouTube, LinkedIn, and social in under 15 minutes. This guide covers both the URL to Video and Text to Video routes, how to choose which posts to convert first, and where to publish each output for maximum reach.
Why Converting Blog Posts to Video Is Worth Your Time
Video delivers ROI 49% faster than text-based content, and 35.1% of marketers now name cross-platform repurposing as a top tactic for 2026. The research and writing cost is already paid. Video distribution is what most teams skip. A video that once took 13 production days now takes around 27 minutes with AI, which makes the economics straightforward.
There’s a compounding search benefit too. Embedding a YouTube video in a blog post increases dwell time, a positive signal for search rankings, and the YouTube video creates a second ranking surface for the same keywords. Leadsagna built this into their standard workflow, and it’s one of the main reasons they switched to Pictory rather than continuing to produce videos manually.
“Script-to-Video for SEO and Social Campaigns: Zoha’s team could repurpose blog content into engaging videos, perfect for embedding on webpages, sharing across social platforms, and increasing time-on-site and video SEO performance.” Source: Leadsagna case study, Pictory
For the broader playbook on turning one blog post into five distinct video outputs, the complete guide to AI content repurposing covers the full system.
Two Ways to Convert a Blog Post into a Video with Pictory
Pictory offers two routes depending on whether your post is already published or still in draft.
URL to Video
Paste the live URL and the AI extracts the text, generates a script, and builds a storyboard automatically. Best for publicly accessible posts, no copy-pasting required.
Text to Video
Paste the raw text directly into Pictory. Good for draft posts, content behind a login wall, or when you want to rewrite the narrative angle before generating the video.
Both routes feed into the same Video Editor, so the editing and branding experience is the same either way.
How to Use URL to Video in Pictory (Step by Step)
This is the fastest route for any publicly accessible blog post. Here’s the full workflow.
Step 1: Select URL to Video
From the Pictory home page, select URL to Video. You’ll see a field to paste your blog URL.
Step 2: Set your video type and length
Paste your blog URL (the page must be publicly accessible). Choose a video type, Explainer, Marketing, Tutorial, or Internal Communication, and set your target platform and length. These choices shape how the AI frames the script.
Step 3: Review and refine the script
The Script Editor opens with the AI-generated draft. Read it through and use the Ask AI tools in the bottom bar, Optimize, Rephrase, Shorten, Lengthen, or Change Tone, to adjust the narrative. You can also edit any line directly in the editor.
Step 4: Configure scene settings and aspect ratio
In the right panel, set your aspect ratio: 16:9 for YouTube, 9:16 for Instagram Reels and TikTok, 1:1 for LinkedIn. Apply your brand kit. Adjust scene settings, sentences per scene, keyword highlights, and max lines per scene, to control how the storyboard is structured.
Step 5: Generate the video
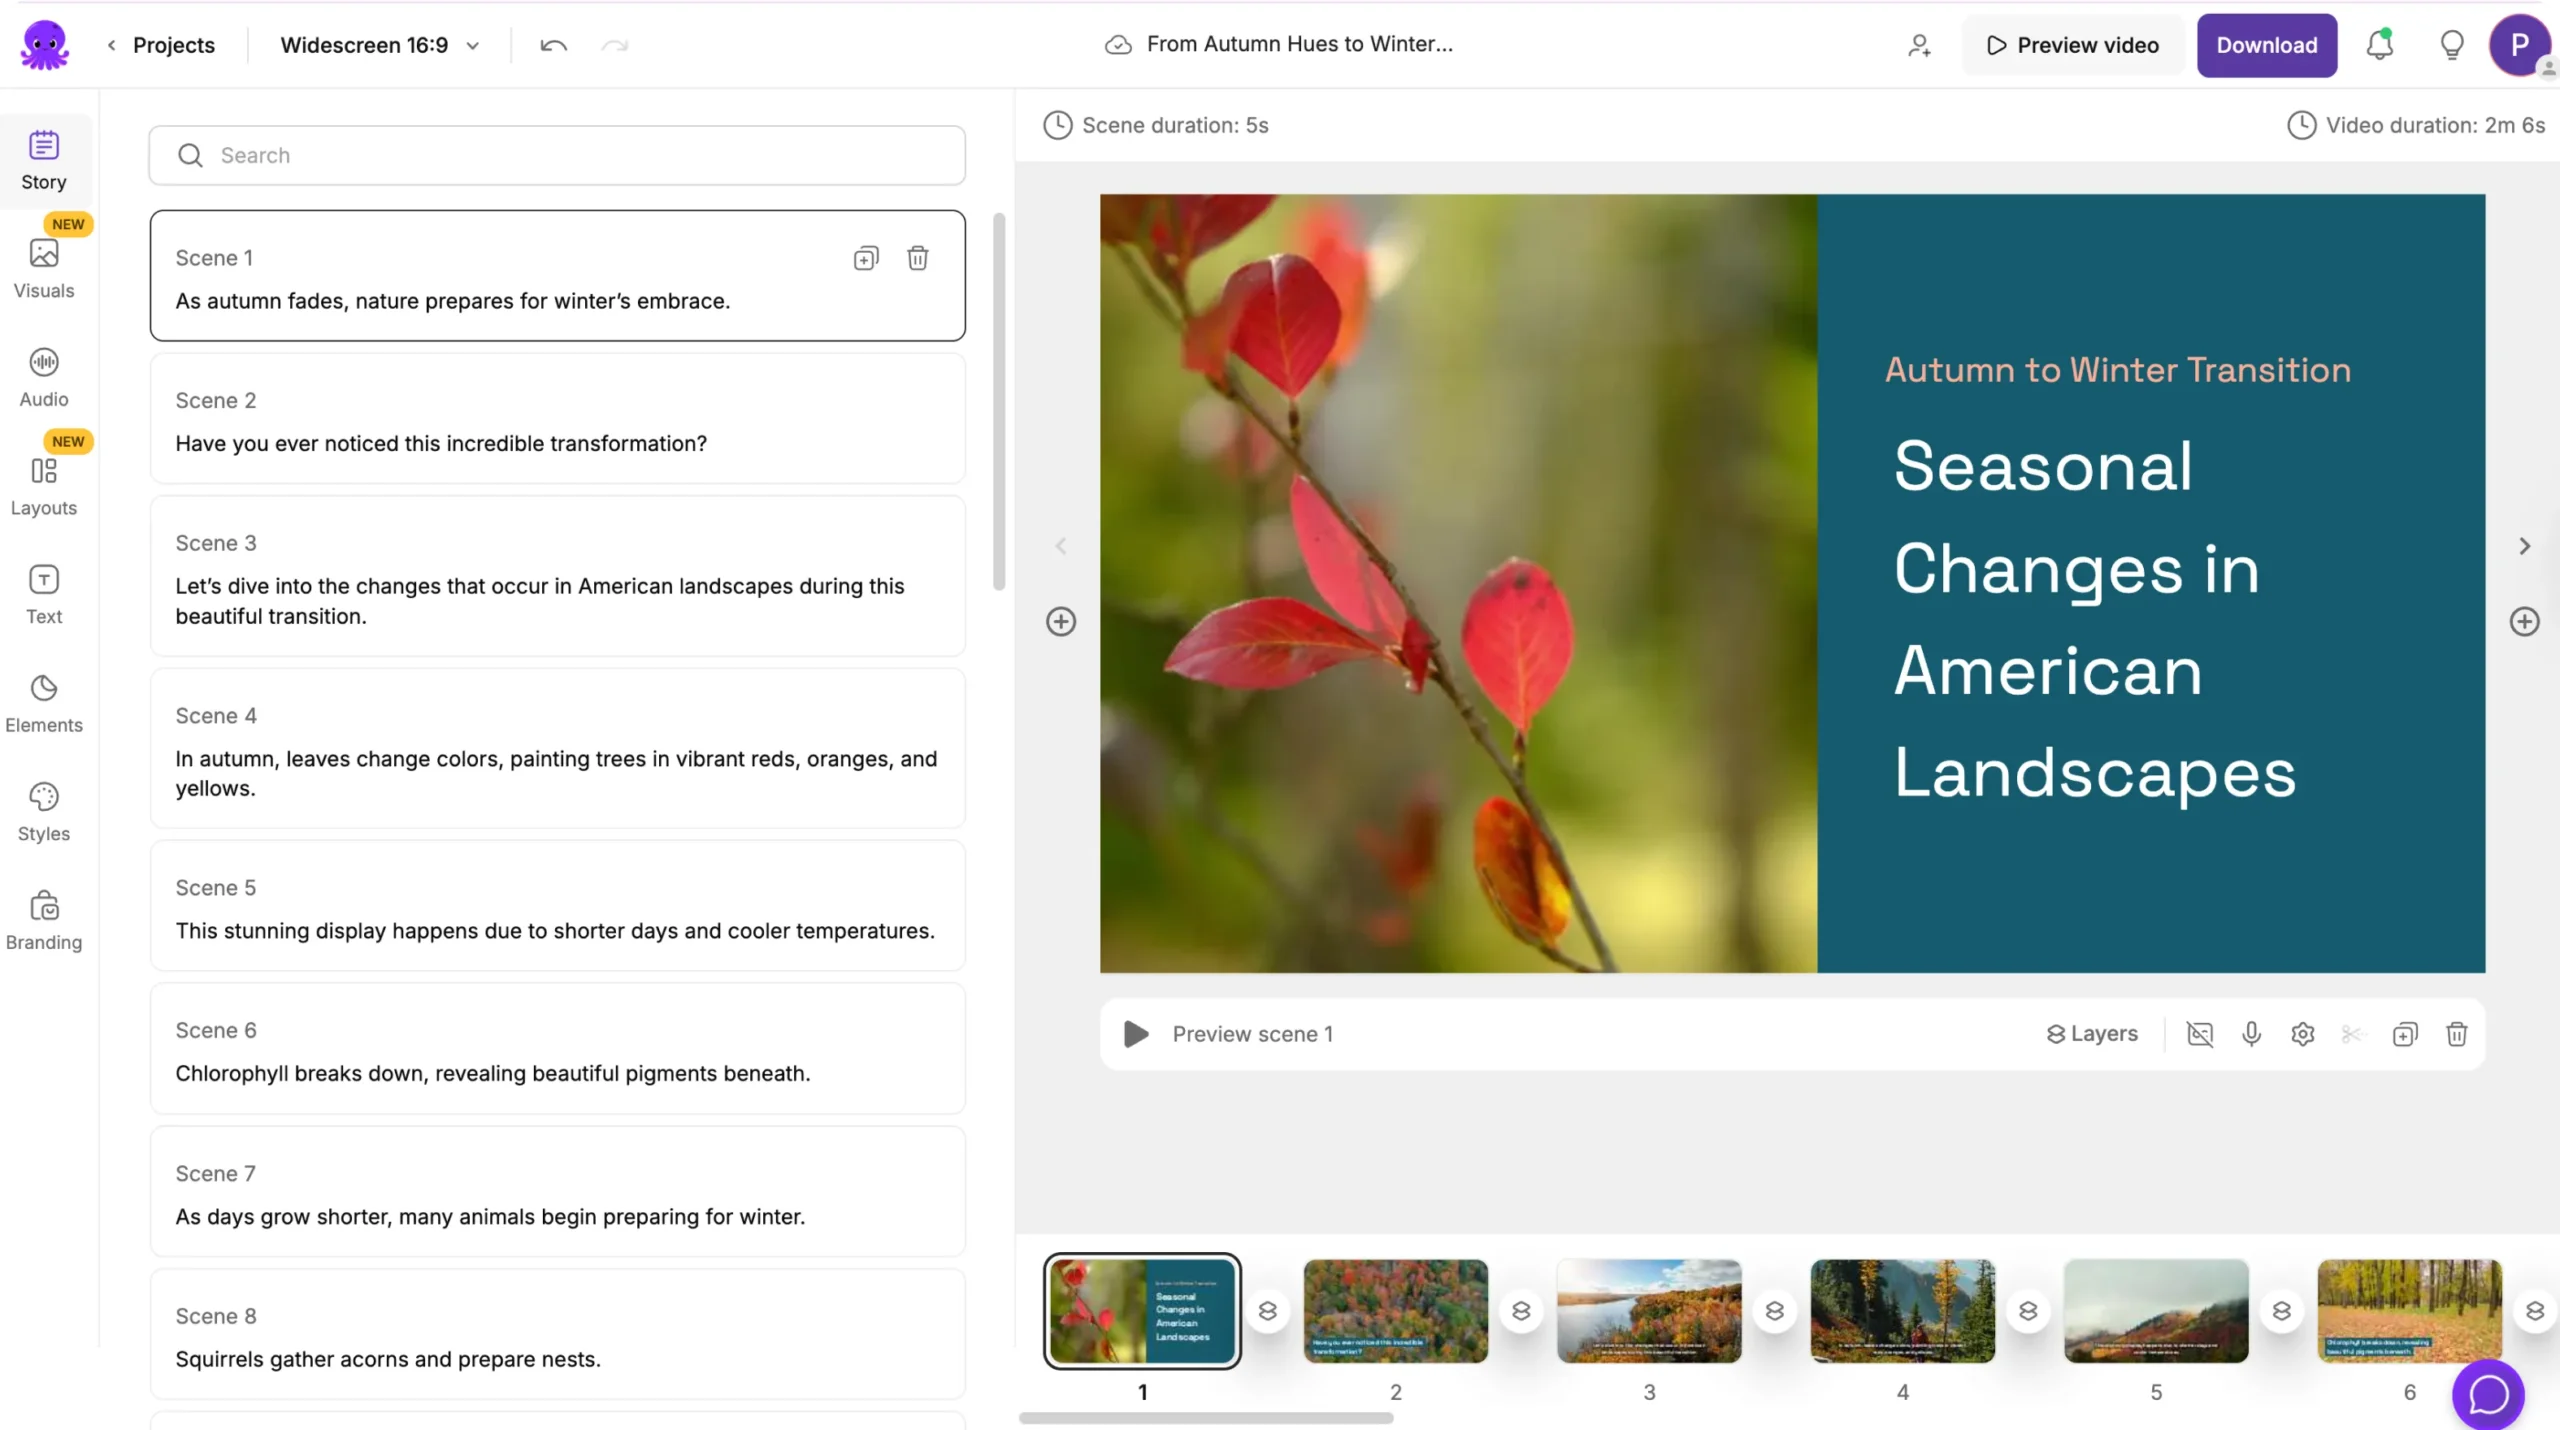
Select Generate Video. Pictory’s AI builds a storyboard with matched stock visuals, synced captions, and a voiceover for each scene. You’ll see a progress bar while scenes are created.
Step 6: Fine-tune in the Video Editor
In the Video Editor, swap any visual using the Visuals tab, or generate custom images for specific scenes using AI Studio. See generating custom visuals in AI Studio. Adjust voiceover in the Audio tab, customize captions in the Styles tab, and add text overlays or elements as needed. For a full editing walkthrough, see adding and customizing subtitles in Pictory.
Step 7: Preview and export
Preview the full video, then select Download Video to export. Your project saves automatically in My Projects for future edits, updates, or collaboration.
How to Choose Which Blog Posts to Convert First
You don’t need to convert every post. Start with the ones most likely to perform. Four selection criteria narrow the field quickly.
Top-converting posts. Content that already drives sign-ups, clicks, or leads in text form will likely do the same in video. At Pictory, the team converts top-converting blog posts into video and embeds them back into the original post to amplify conversions from both the article and the YouTube video. This practice is detailed in the complete blog to video guide.
Posts targeting competitive keywords where you’re not on page one. A YouTube video on the same topic gives you a second ranking surface and can appear in search results even when the blog post can’t.
Evergreen content. Posts with timeless topics, how-tos, explainers, strategy guides, keep generating views without requiring updates. Prioritize these over news-driven posts.
Posts with strong visual potential. Numbered lists, step-by-step guides, and comparison content translate cleanly into video scenes. Posts that are mostly narrative prose need more script editing to work well as video.
Tips for a Better Blog to Video Result
Tighten the script before generating. The AI extracts and condenses your blog post, but if the original is long, use Ask AI > Shorten to focus the narrative. A tighter script produces a cleaner storyboard with fewer visual mismatches.
Replace generic stock visuals with custom AI images. The Visuals tab lets you swap any scene’s background. For niche topics where stock footage feels off-brand, open AI Studio and generate a custom image from a text prompt. The result looks specific to your content rather than generic. See how to create AI images in Pictory’s AI Studio.
Apply your brand kit before exporting. Logo, colors, and fonts apply across every scene with one click. Leadsagna attributes part of their SEO lift to the consistent, professional look of their Pictory videos. Search rankings and viewers both respond to production quality.
Don’t skip captions. Pictory generates and syncs captions automatically. Customize their style and position in the Styles tab to match your brand. For the full walkthrough, see adding and customizing subtitles in Pictory.
URL TO VIDEO
Turn your best blog posts into videos today
Paste any URL into Pictory and the AI handles the script, visuals, captions, and voiceover automatically.
Where to Publish Your Blog-to-Video Content
Getting the most from a blog-to-video conversion means publishing the output in at least three places, not just uploading it to YouTube and moving on.
Embed it back into the original blog post. This is the double-SEO win. The video increases dwell time on your blog post (positive ranking signal) while the YouTube embed gives the video a quality backlink. Leadsagna made this a standard step in their workflow for exactly that reason.
YouTube. Export in 16:9 and publish as a standalone explainer or how-to video. Use the same primary keyword from your blog post in the title and description. You’re targeting the same search intent on a second platform.
LinkedIn. For B2B marketers, a 90-second to two-minute summary version performs well in the feed. Export in 1:1 or 16:9 and use the blog post’s key takeaway as the video’s opening line.
Instagram Reels and TikTok. Use the Highlights workflow to extract the strongest 30-60 seconds from your video. Export in 9:16 for vertical viewing. Pair with a caption that references the full article for anyone who wants to go deeper. For more on this workflow, see how to repurpose content into short social clips.
Is Blog to Video Right for Your Content Strategy?
This workflow works best for marketers and content teams who publish regularly, target keywords with video search intent, and want to build a YouTube presence without a dedicated video production budget. Blog to video is a practical choice for teams in this position: you’re extending reach from work already done, not adding a new content format from scratch.
For highly personal or opinion-driven writing where the author’s voice and perspective are the substance, an AI-narrated version won’t land the same way as a post written directly for readers. In those cases, recording yourself presenting the article’s key ideas via the Screen Recorder workflow is a better fit.
For most SEO-focused, how-to, or thought leadership posts, the conversion is straightforward and the reach gain is real. Paste the URL, review the script, apply your brand, and publish. If you want to see how blog to video fits into a broader content repurposing system, the AI content repurposing guide maps out the full workflow across every format.
Your blog posts are already half a video. Let’s finish the job.
Paste any URL into Pictory and get a branded, captioned, voiceover-ready video for YouTube, LinkedIn, and social in under 15 minutes.
FAQ: Blog Post to Video
Can I turn any blog URL into a video, or does the content need to be formatted a specific way?
Any publicly accessible blog URL works with Pictory’s URL to Video feature. The AI reads the text content of the page and generates a script. Pages behind login walls or paywalls aren’t accessible. For those, use Text to Video and paste the content directly.
How long should a blog-to-video be?
It depends on the platform. For YouTube, three to 10 minutes works well for explainer and how-to content. For LinkedIn, one to three minutes performs well. For Instagram Reels and TikTok, aim for under 60 seconds using your strongest clip. Pictory lets you set target length in the scene settings before generating.
Will the video look branded, or will it use a generic template?
Apply your brand kit in Pictory before exporting and every scene will carry your logo, brand colors, and chosen fonts. You can also choose a style theme and customize individual text treatments in the Video Editor. The output is yours, not a generic template.
Does Pictory add captions automatically when converting a blog to video?
Yes. AI-generated captions sync to the voiceover automatically. You can customize their style, font size, and position in the Styles tab. For a full walkthrough, see Pictory’s guide on adding and customizing subtitles.
How is blog to video different from just screen-recording a blog post?
A screen recording shows a static page. Blog to video AI extracts the content, rewrites it into a flowing script, matches relevant stock footage or AI-generated visuals to each point, adds a voiceover, and burns in captions. The output is a fully produced video, not a recording of a webpage.