The Images to Video feature in Pictory AI helps you turn static images into dynamic, engaging videos in just a few clicks. Whether you are creating product showcases, photo slideshows, social media reels, or event highlights, this workflow lets you combine images, music, text, and branding into a professional-quality video.
What Is the Images to Video Feature?
The Images to Video workflow allows you to upload your own images and videos, arrange them in sequence, and let Pictory automatically generate a storyboard. Each image or video becomes a video scene, which you can customize with text overlays, background music, and brand styling.
Pictory’s AI will:
Arrange your uploaded images and video into a video sequence
Create automatic scenes with captions
Add transitions between slides
Allow full customization of text, visuals, and audio
Perfect for:
Marketers creating short product promos or social posts
Photographers showcasing portfolios or event highlights
Educators summarizing lessons with images and text
Brands turning visuals into video content for social platforms
Step-by-Step: How to Use the Images to Video Tool
Follow this simple guide to create a video using your images.
Step 1: Access the Images to Video Tool
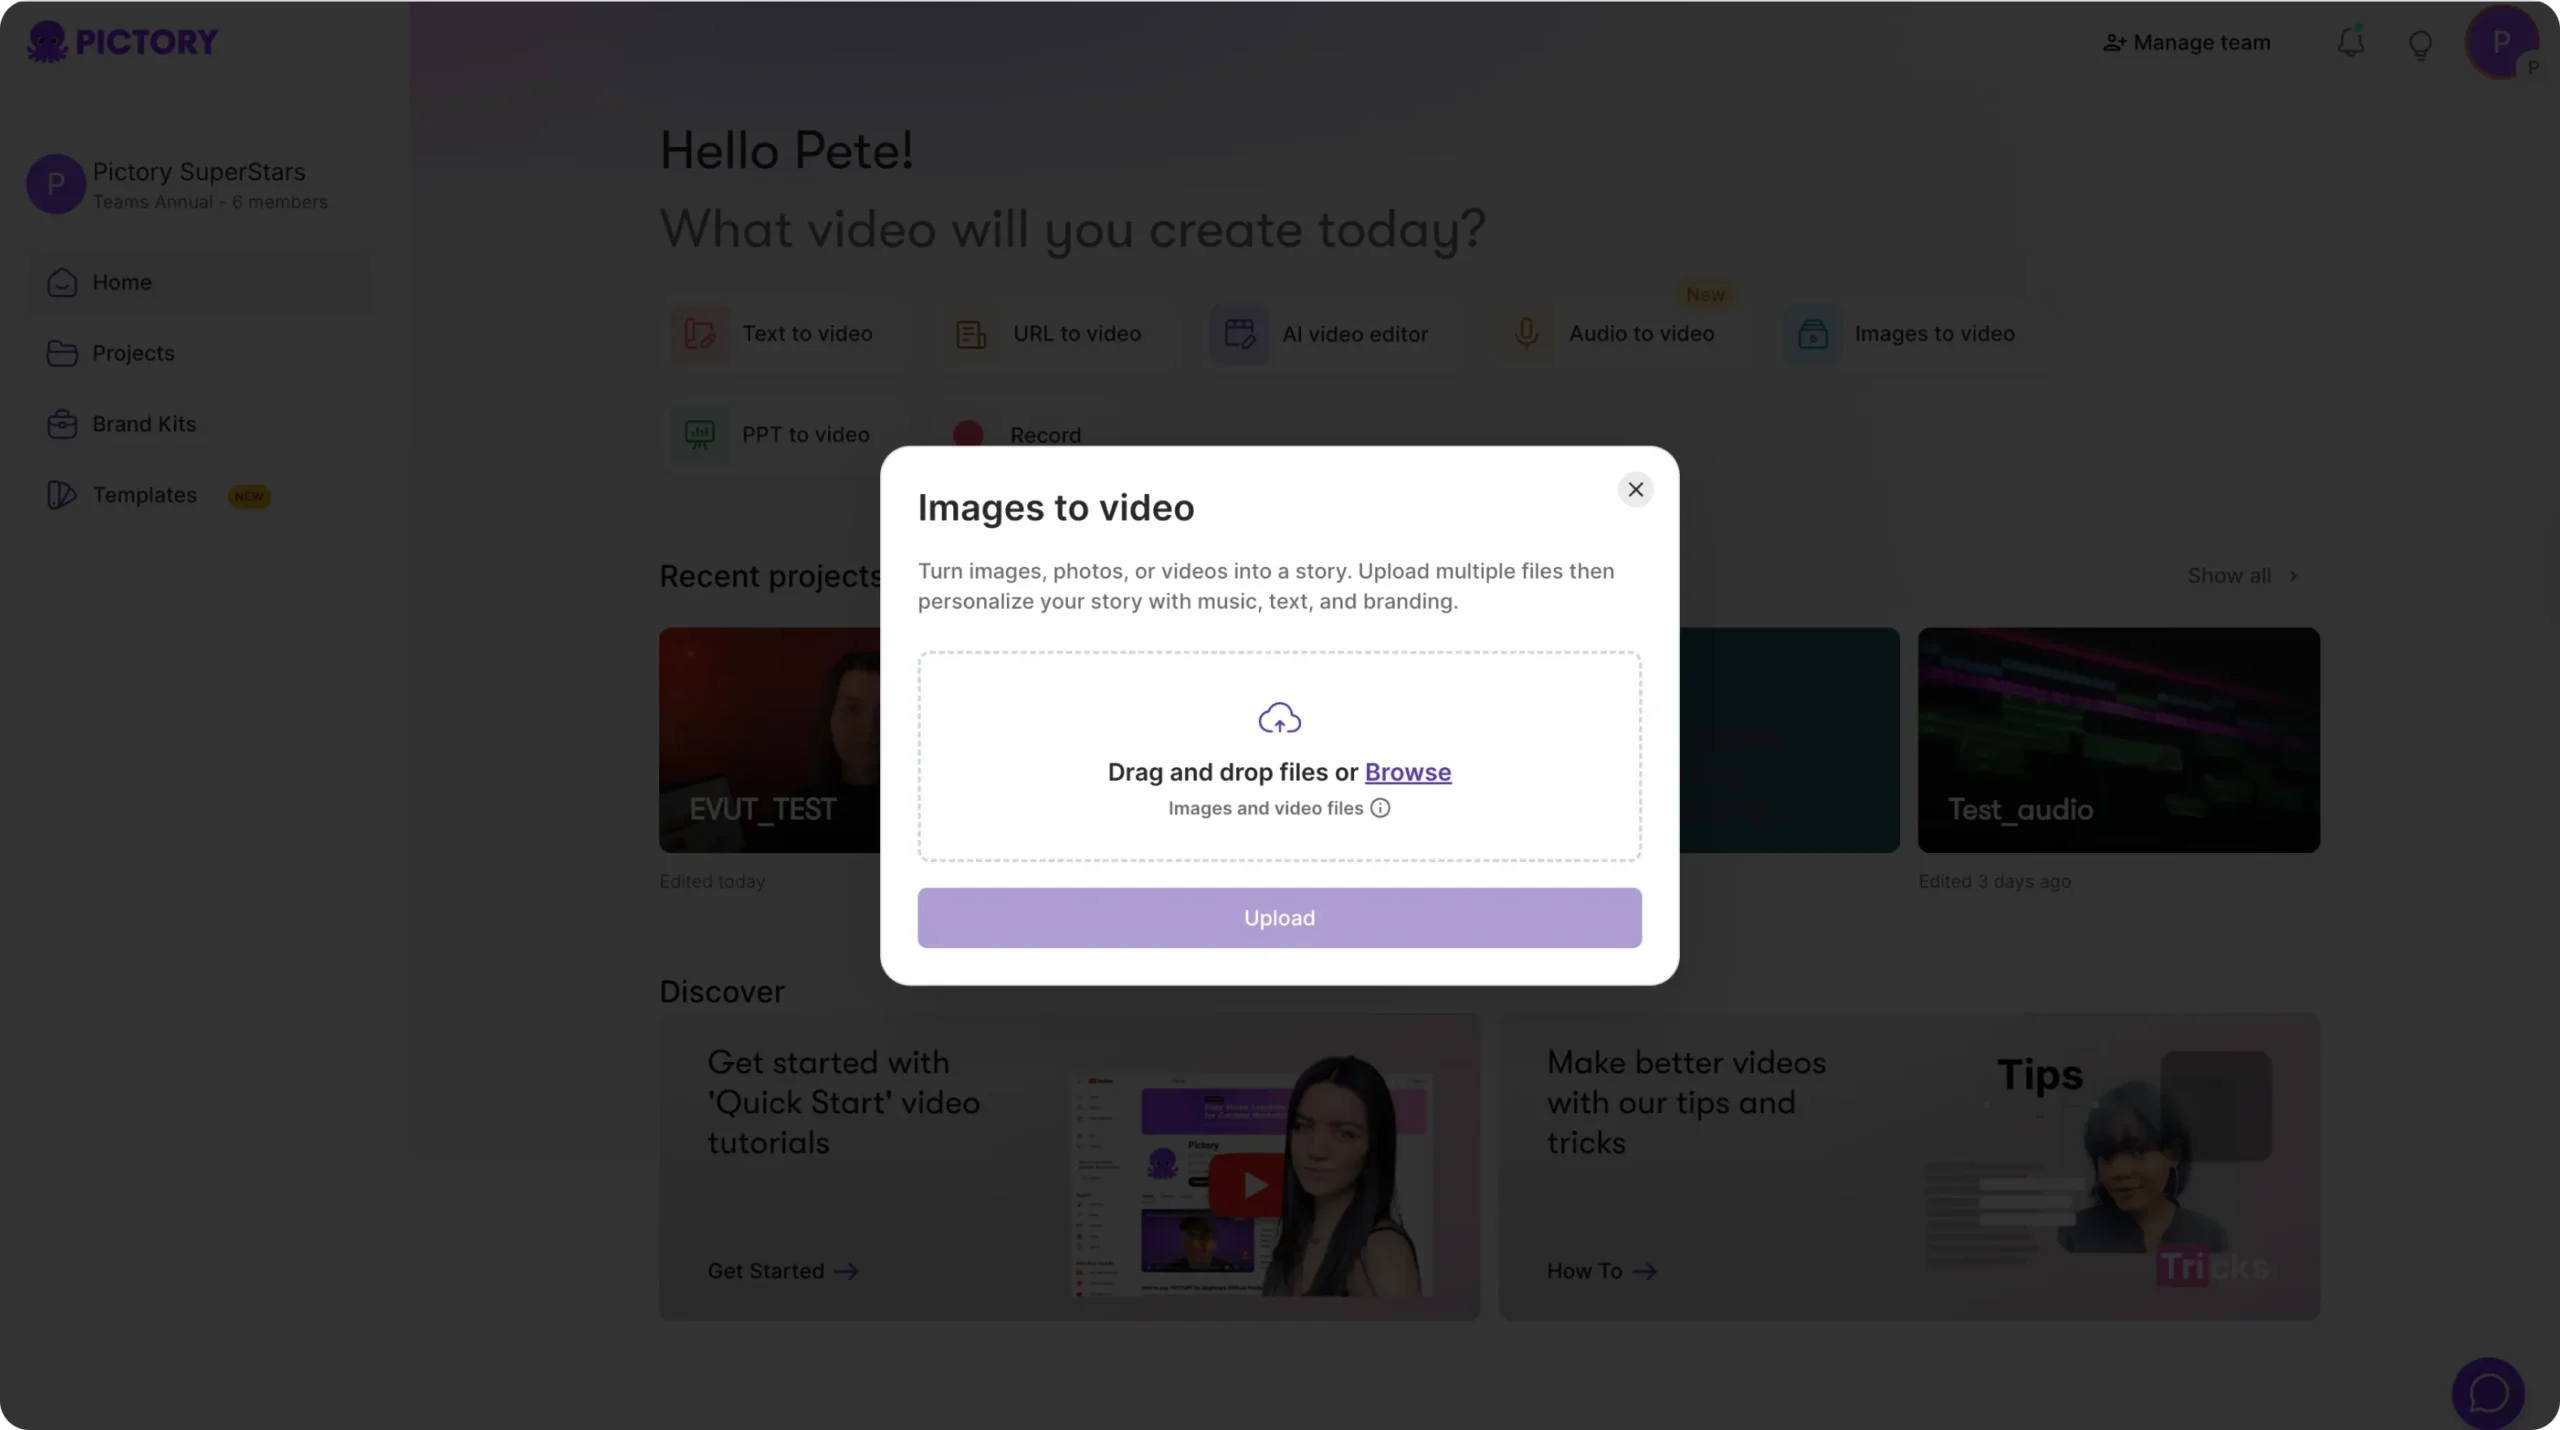
From your Pictory Home Page, select Images to Video.
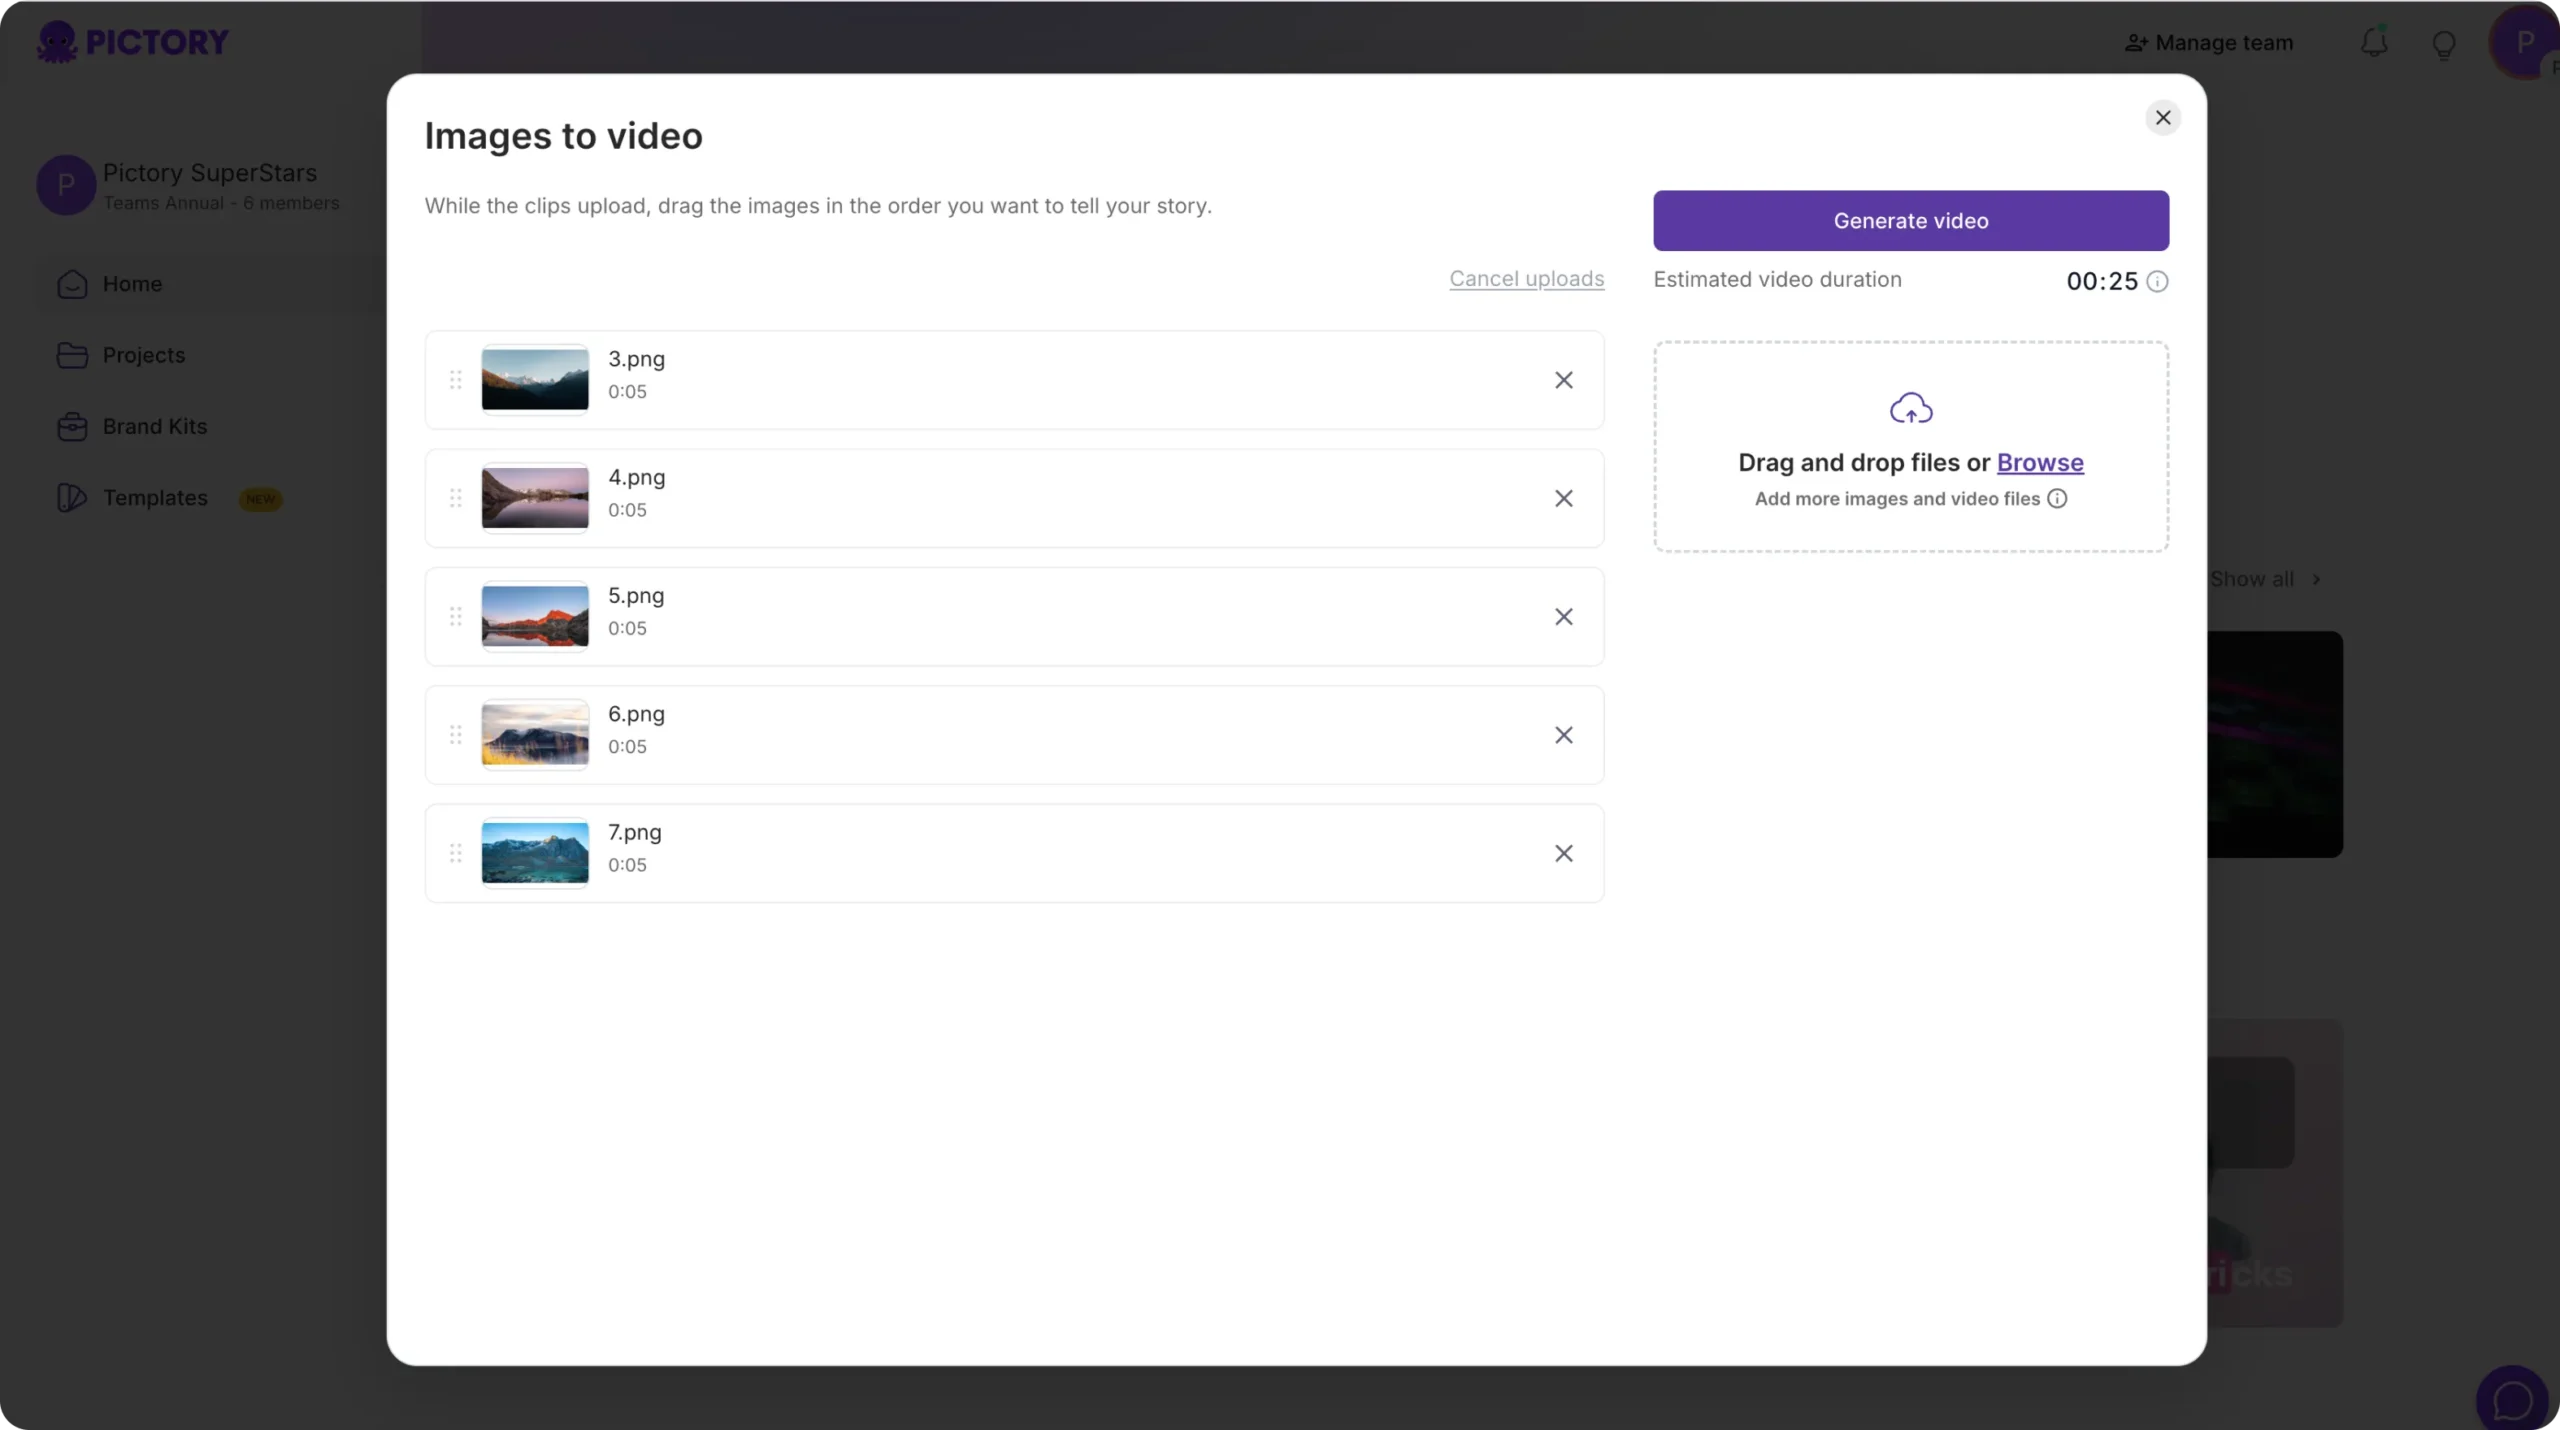
Upload your images by either dragging and dropping them into the upload area or clicking Browse to choose from your computer.
You can upload both images and short video clips if you want to mix formats.
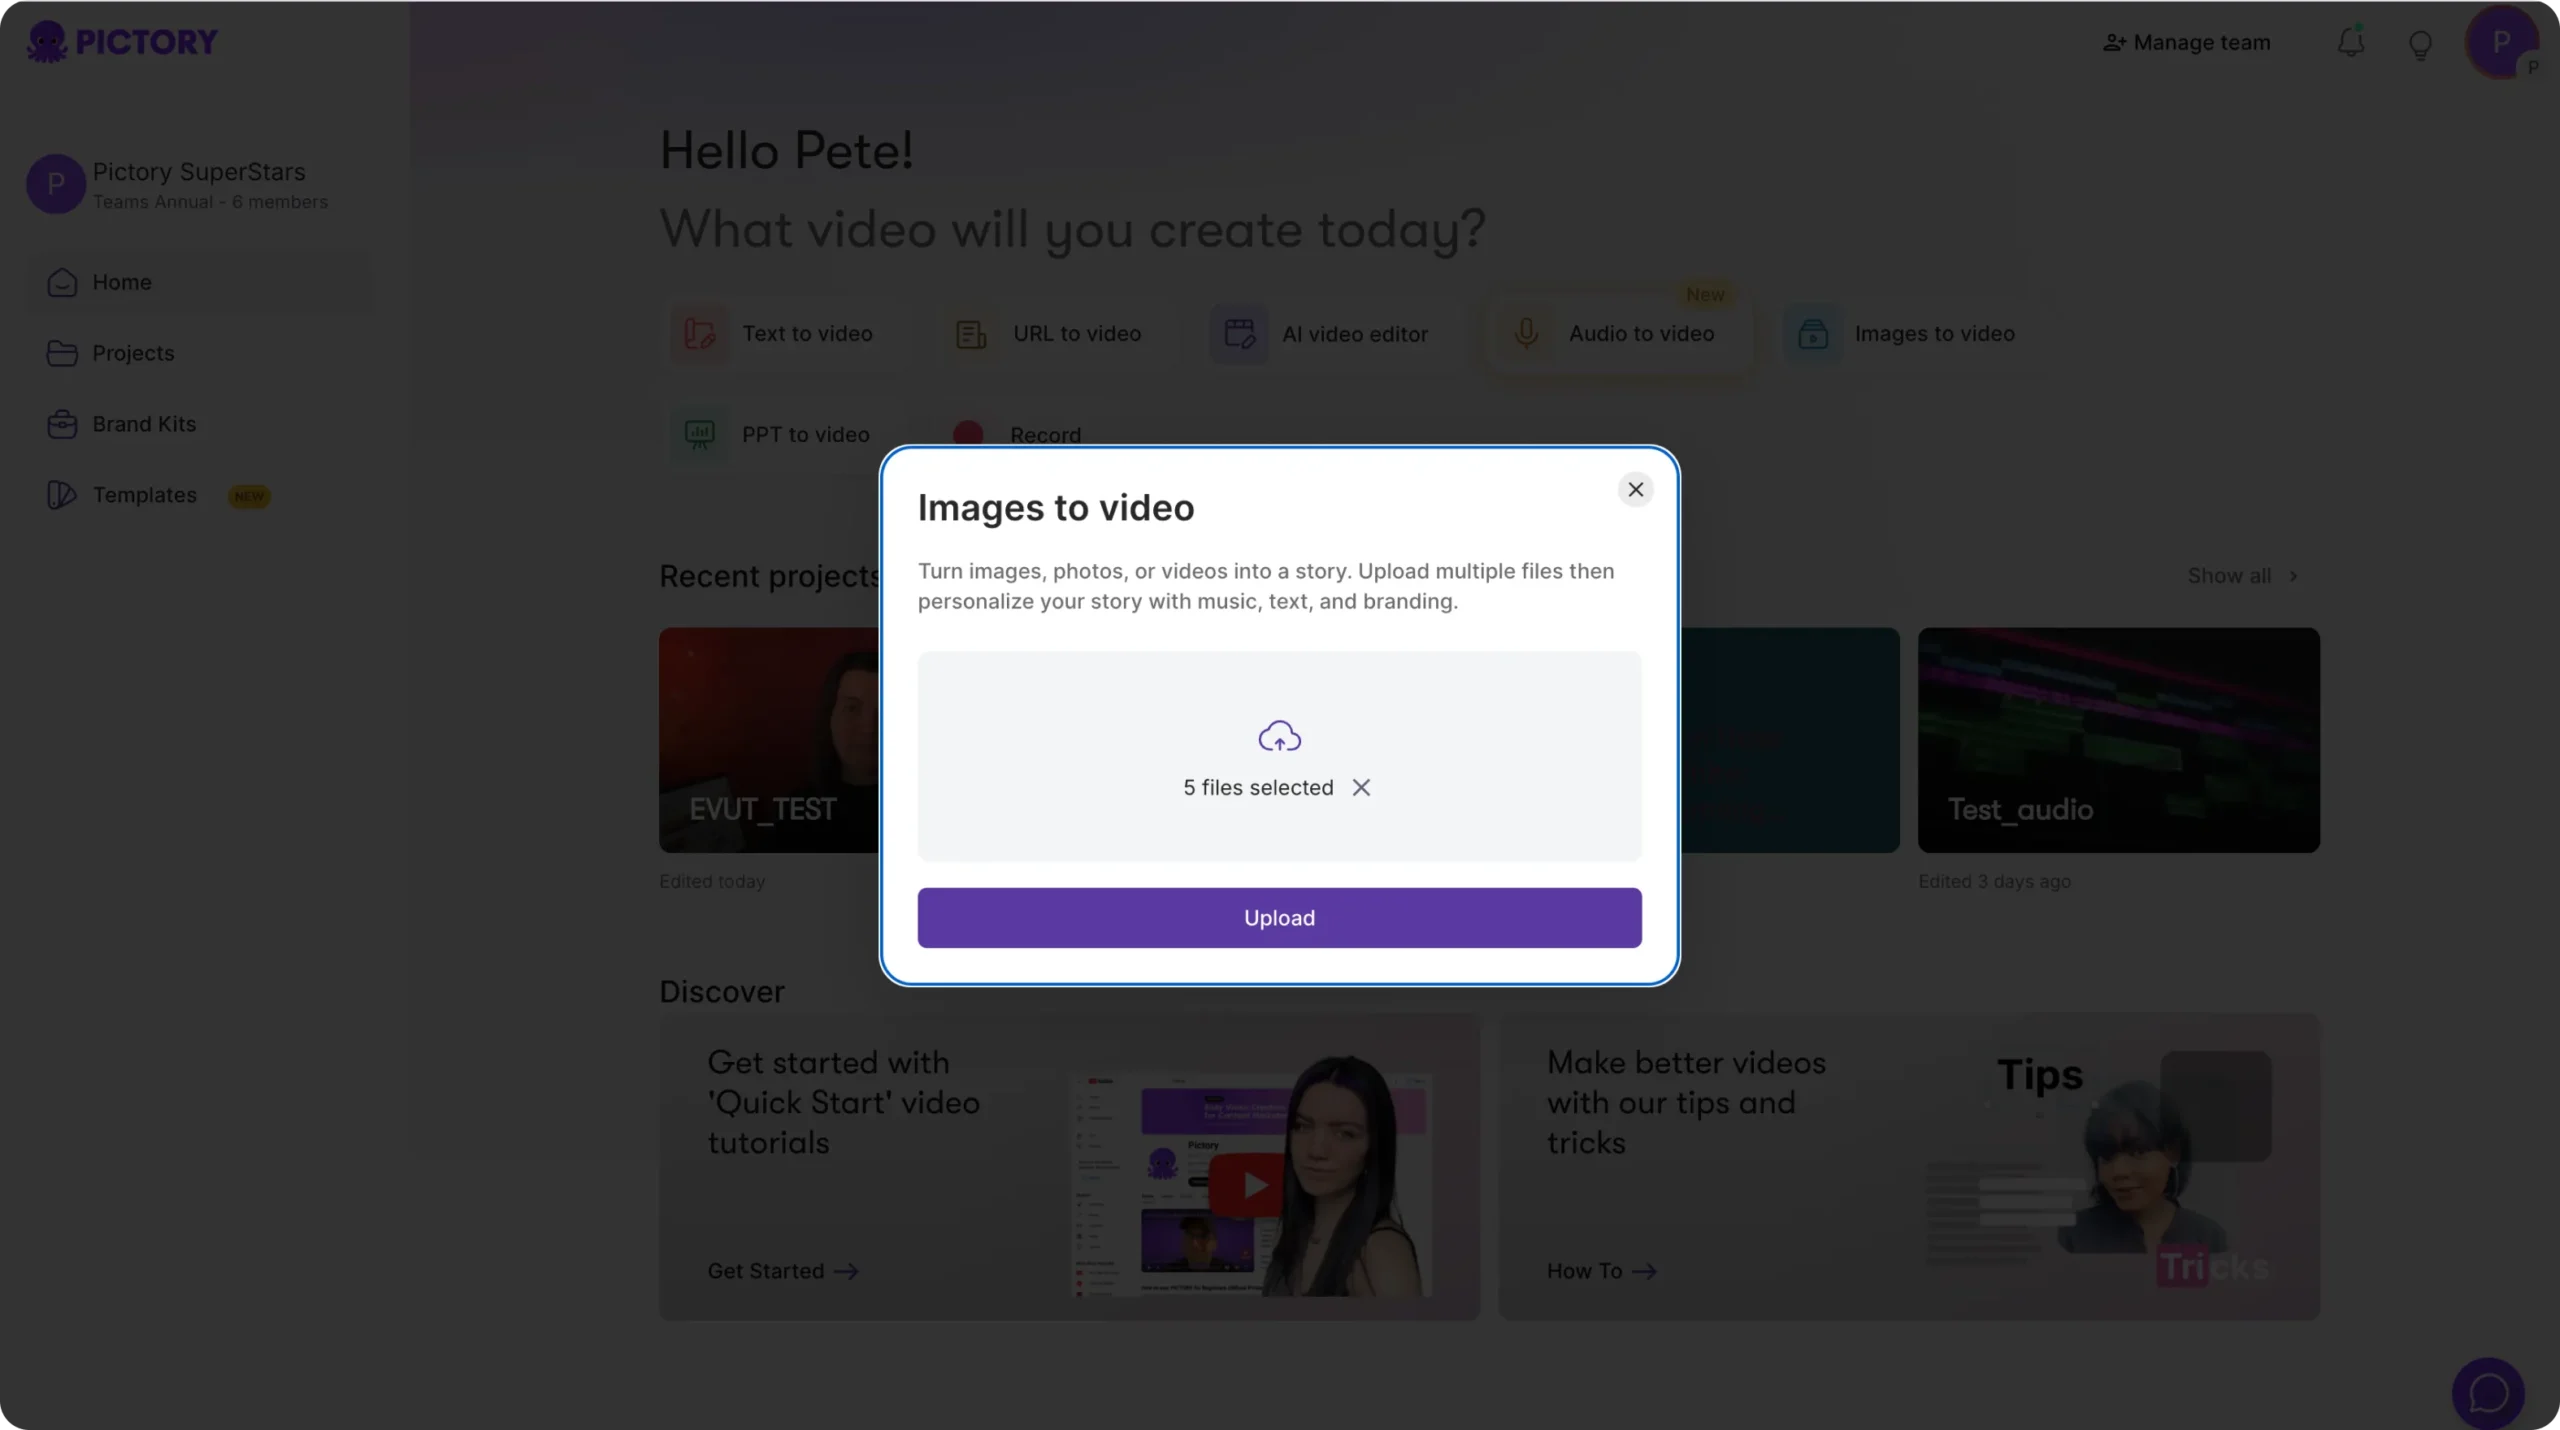
Once uploaded, you will see thumbnails of all your images in the upload panel.

Step 2: Arrange Your Image Order
Your uploaded files appear as a list of thumbnails with:
Preview image
Default duration per scene (5 seconds)
Delete (X) option
You can drag and drop images to change their order or remove unwanted files.
Use the Estimated Video Duration indicator in the top corner to track total video length.
Step 3: Generate the Video
Once you have arranged your images, click Generate Video.
A progress screen will appear with the message: “Please wait while the video storyboard is being created…”
A percentage progress bar will show the creation process.
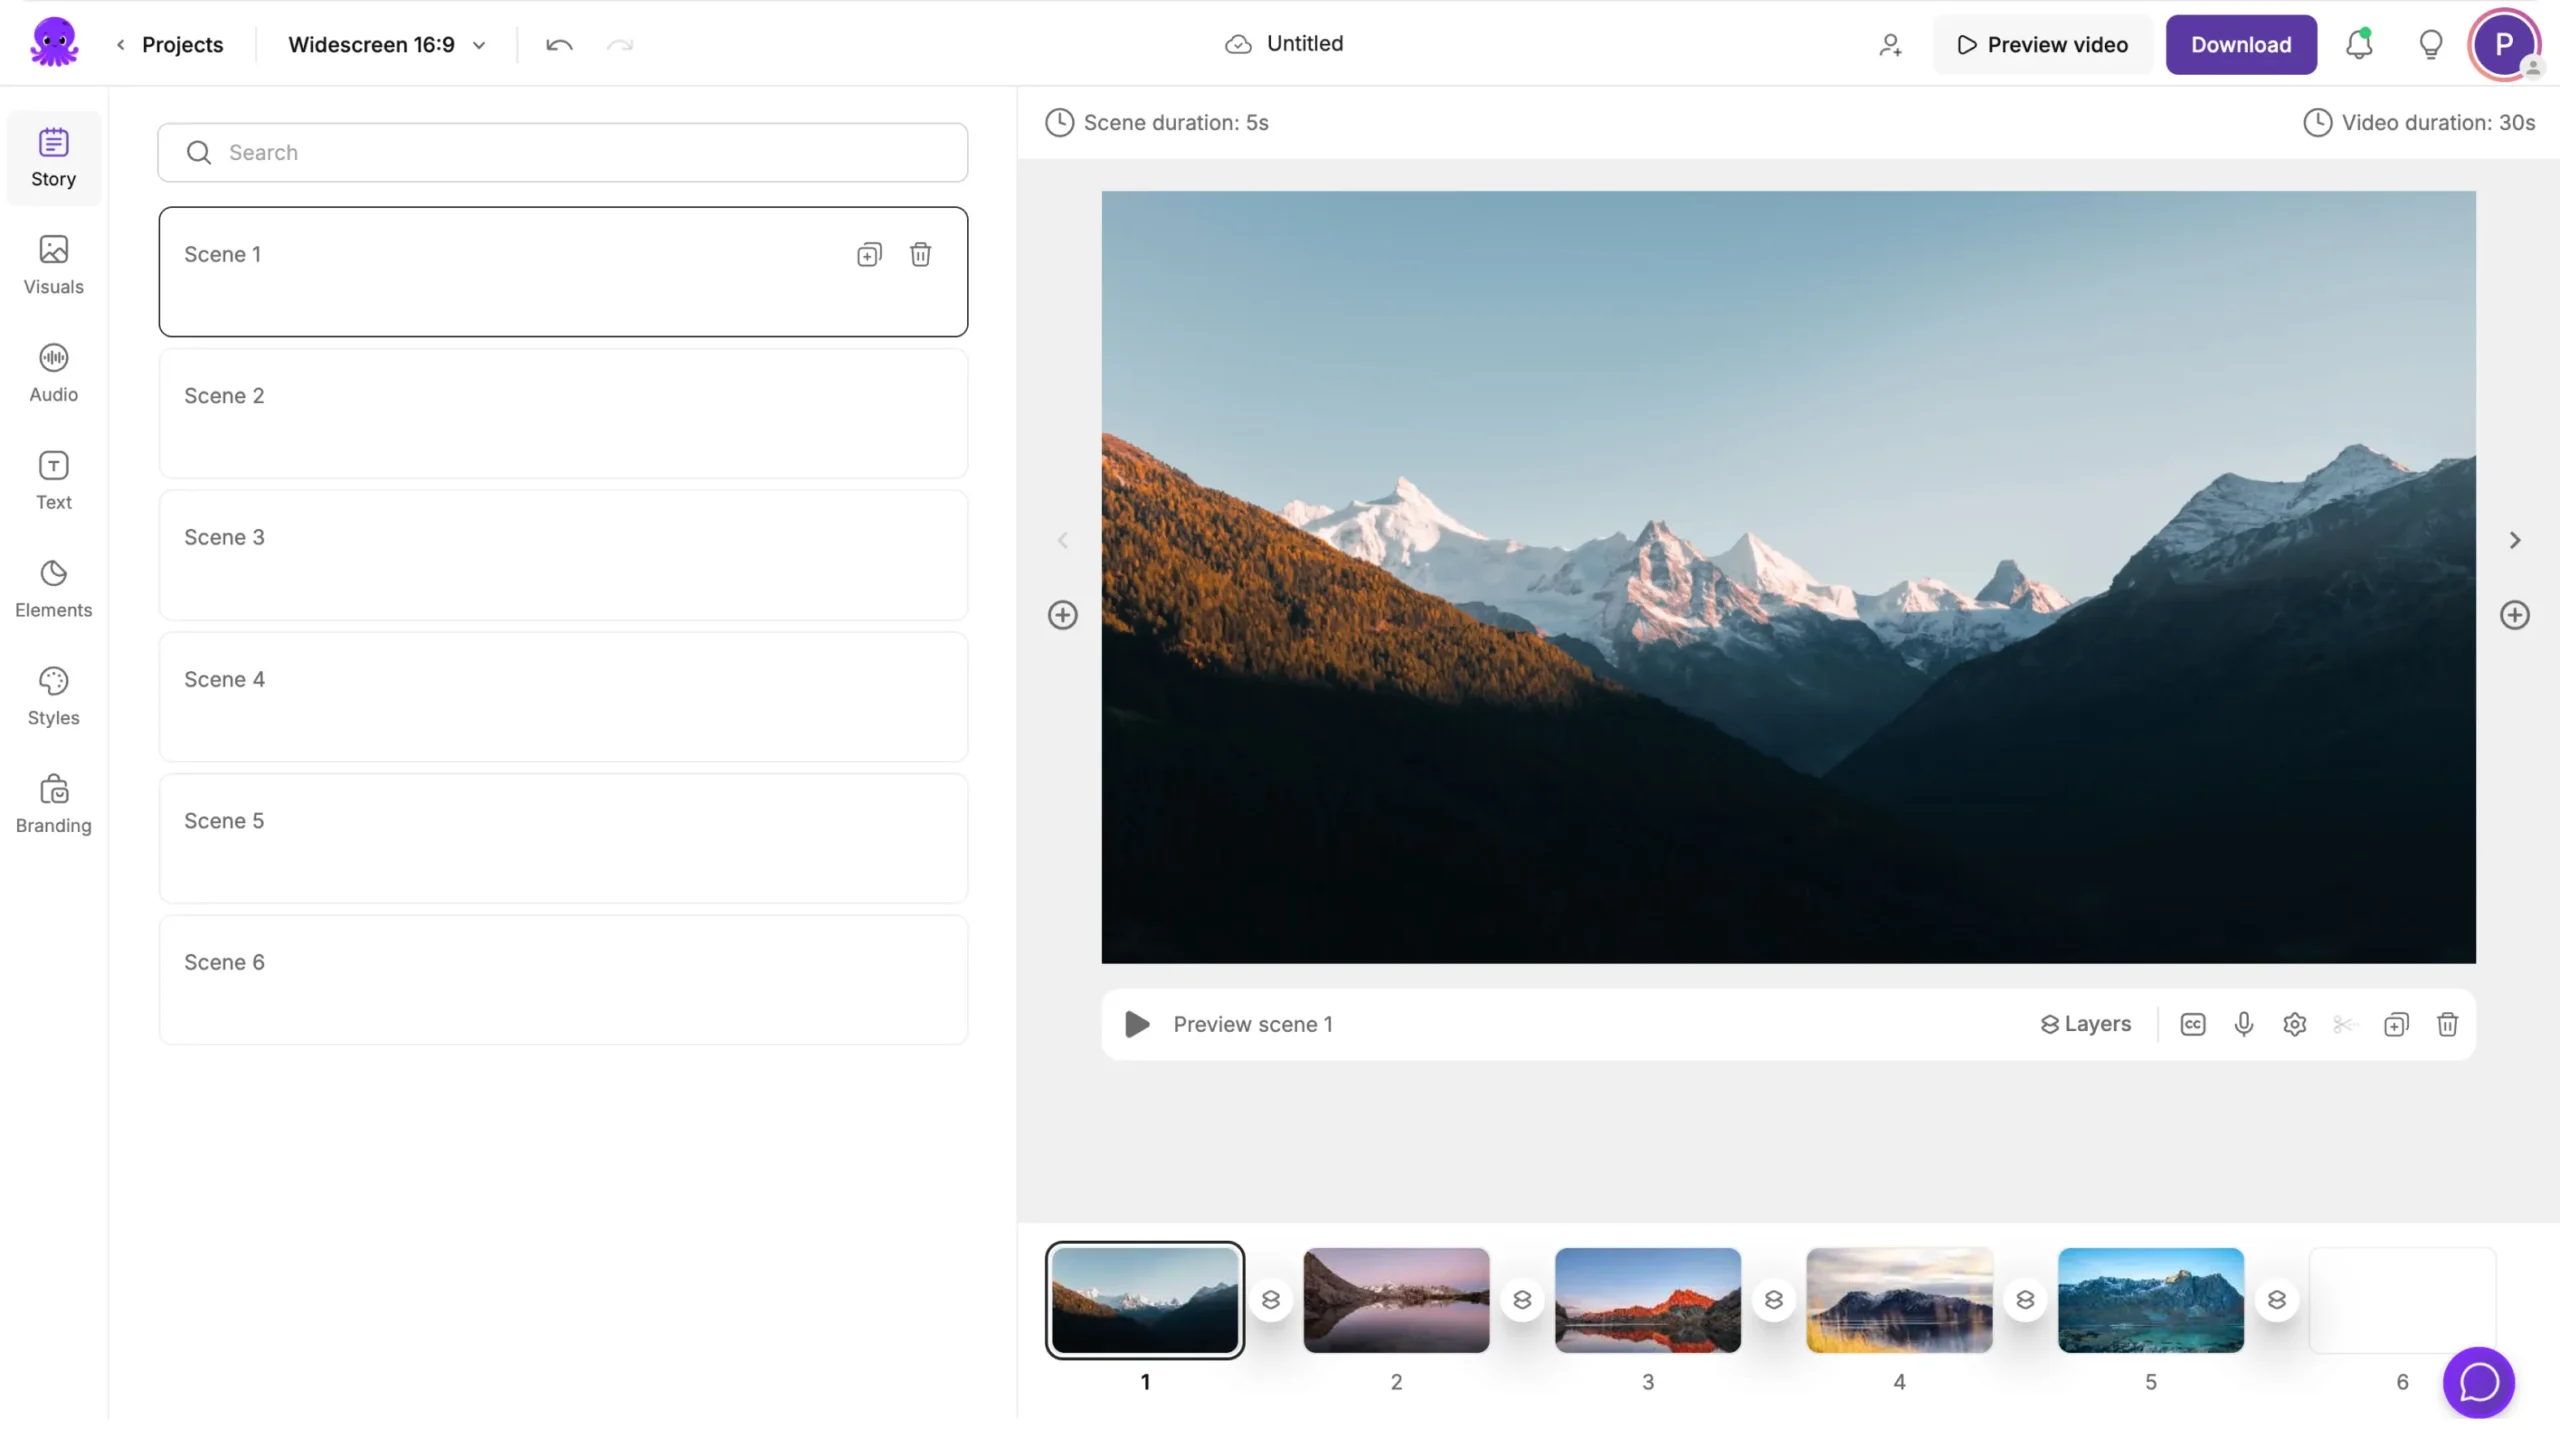
When the storyboard is ready, you will enter the AI Video Editor to refine your project.
Step 4: Review and Edit Your Storyboard
Each image is now displayed as a scene in your video storyboard.
You can:
Add or edit text captions in the Story Tab
Replace visuals or add more images in the Visuals Tab
Insert music or AI voiceovers in the Audio Tab
Apply text overlays, shapes, or icons using the Text and Elements Tabs
Use your Brand Kit for consistent colors, fonts, and logos
Use Preview Video to check how your scenes flow together.
Step 5: Adjust Scene Duration and Transitions
In the Bottom Timeline, you can:
Change how long each image stays on screen
Adjust transition styles between scenes
Reorder scenes for better flow
Shorter scene durations work best for fast-paced social media videos, while longer durations are ideal for slideshows or explainers.
Step 6: Customize Styles and Themes
In the Styles Tab, choose a look that matches your content. Popular styles include:
Sleek
Clean
Indigo Ink
Navy Blue
Bold Edge
Each theme applies coordinated text styles, fonts, and colors automatically. You can also create and save your own custom style.
Step 7: Add Branding
Open the Branding Tab to apply your Brand Kit. You can:
Add your logo
Apply your brand colors
Use your preferred fonts
Your brand kit ensures that every video you create matches your visual identity perfectly.
Step 8: Preview and Export Your Video
When your video is ready, click Preview Video to view it in full. Once satisfied, click Download Video to export it in your preferred format and resolution.
Your finished video will also be saved under My Projects, allowing you to return and make edits later.
Pro Tips for Best Results
Upload high-resolution images for clear visuals.
Keep captions short and easy to read.
Add background music that matches the tone of your video.
Use your Brand Kit to make all videos consistent.
Preview the entire video before downloading.
Why Use Pictory AI for Images to Video
The Images to Video feature helps you bring still photos to life without manual editing or design tools.
You get:
Automatic scene creation from your uploaded images
Built-in text, music, and branding tools
AI-assisted layout and pacing
Instant preview and export options
It is the fastest way to turn image collections into professional, ready-to-share videos.
Frequently Asked Questions
What image formats does Pictory support?
Pictory supports standard image formats such as JPG, PNG, and BMP.
Can I mix images and short videos in the same project?
Yes. You can upload both and arrange them in any order.
Can I change how long each image stays on screen?
Yes. Adjust scene duration using the Bottom Timeline.
Can I apply my logo and colors automatically?
Yes. Use the Branding Tab to apply your Brand Kit to the entire project.
Does Pictory add transitions automatically?
Yes. Pictory adds smooth transitions between images, which you can modify if desired.

