Taking a screenshot on a Mac is simple and involves using keyboard shortcuts. With combinations like Shift + Command + 3 for capturing the entire screen and Shift + Command + 4 for selecting specific areas, mastering these shortcuts can enhance your productivity. In this guide, you’ll learn all the necessary steps on how to screenshot on Mac and additional tips on using built-in tools and third-party applications.
Key Takeaways
-
Master Mac screenshot shortcuts like Shift + Command + 3 for full-screen captures and Shift + Command + 4 for selective captures to enhance efficiency.
-
Explore third-party screenshot tools like CleanShot X and Snagit for advanced features, such as scrolling captures and editing options.
-
Implement best practices, like annotating and cropping screenshots, to create professional and clear images that effectively convey information.
Essential Mac Screenshot Shortcuts
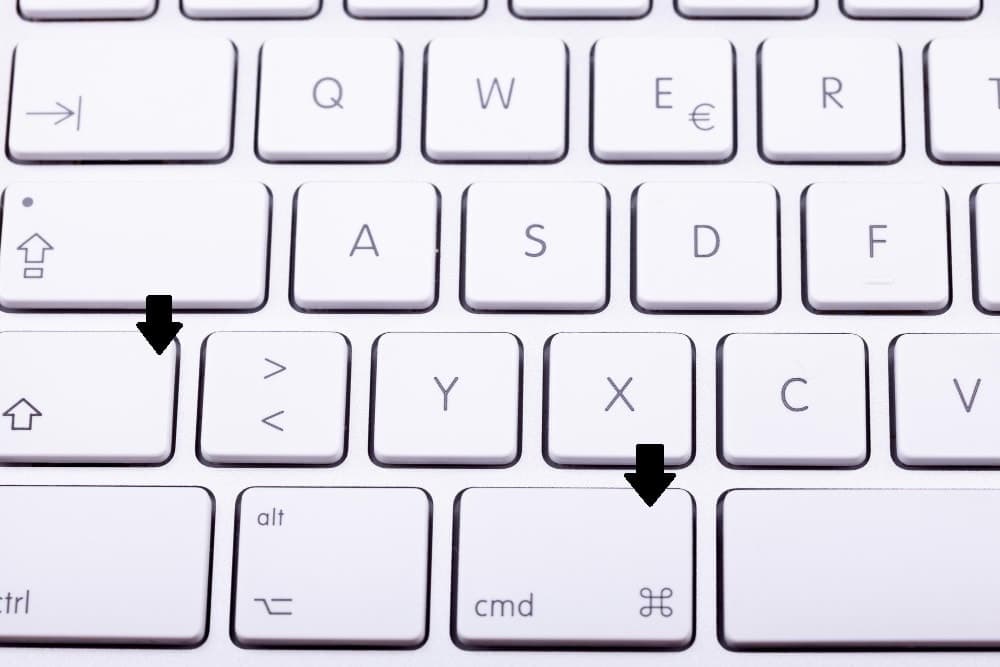
Mastering Mac screenshot shortcuts is the first step toward efficient screen captures. These keyboard shortcut captures are simple yet powerful, allowing you to capture the entire screen, a specific portion, or even a specific window with just a few keystrokes. Knowing these shortcuts can save you time and make your workflow more efficient.
The primary shortcuts for taking screenshots on a Mac include several key combinations. From capturing the entire screen with Shift + Command + 3 to using the advanced options available with Shift + Command + 5, you’ll learn how to make the most of your Mac’s built-in screenshot tool.
Shift + Command + 3: Full Screen Capture
To capture everything on your screen, use Shift + Command + 3. Pressing these keys simultaneously captures the entire screen record, saving the screenshot to your desktop. This is perfect for capturing full-screen presentations, entire webpages, or anything else that requires a comprehensive view.
After taking the screenshot image, a small thumbnail preview appears in the lower-right corner of your screen. This allows you to quickly access and edit the screenshot if needed. You can take a screenshot of the file, which is usually named ‘Screenshot’ followed by the date and time, making it easy to find and organize.
Capturing the entire screen capture is useful but it includes everything visible, even unnecessary clutter or sensitive information. This can include sensitive information or unnecessary clutter, so make sure to review and crop your screenshot if needed.
Shift + Command + 4: Selective Screen Capture
When you need to capture only a part of the screen, use Shift + Command + 4. This shortcut changes your cursor into a crosshair, enabling selection of a specific screen area to capture. You can click and drag to define the area you want to capture, giving you precise control over what appears in your screenshot.
This method is ideal for capturing specific elements, like a single window, a particular section of a webpage, or a snippet of a document. It provides flexibility and precision, ensuring you capture exactly what you need without any extraneous content.
Shift + Command + 4, then Space: Specific Window Capture
To capture a specific window, use Shift + Command + 4 and then press the Space bar. After pressing these keys, your cursor changes to a camera icon. You can then click on any window to capture it as a screenshot.
This method is particularly useful for capturing application windows or dialog boxes. It ensures that only the selected active window is captured, providing a clean and focused screenshot without any background distractions.
Shift + Command + 5: Advanced Screenshot Options
Shift + Command + 5 opens the macOS Screenshot app, offering more flexibility and options. This built-in tool offers a variety of capture options, including capturing the entire screen, a specific window, or a selected area. It also provides options for screen recording, giving you the ability to capture video of your screen activities.
The Screenshot app is included in macOS versions Mojave, Catalina, Big Sur, Monterey, Ventura, and Sonoma, making it a versatile tool for all modern Mac users. With its advanced features and easy-to-use interface, the Screenshot app is a powerful addition to your screenshot toolkit.
Shift + Command + 6: Touch Bar Capture
If you have a Mac with a Touch Bar, Shift + Command + 6 is the shortcut for capturing it. This command captures an image of the Touch Bar and saves it to your desktop. It’s a handy feature for those who need to document or share Touch Bar configurations and layouts.
The Touch Bar capture functionality is particularly useful for developers, designers, and anyone who needs to share their Touch Bar setup with others. It provides a quick and easy way to capture this unique part of the Mac interface.
Using Third-Party Screenshot Tools
While the built-in screenshot tools on a Mac are powerful, sometimes you need more advanced features. This is where third-party screenshot tools come in. These tools offer enhanced functionalities such as advanced editing, quick sharing, and high-quality image capture. They can significantly boost your productivity and make your screenshots more professional.
Several third-party screenshot on mac apps offer enhanced functionalities for Mac users. Tools like CleanShot X, Snagit, and Capto bring unique features and capabilities to enhance your screenshot-taking experience.
CleanShot X
CleanShot X is a powerful screenshot app that offers a range of advanced features. It allows you to take scrolling screenshots, recognize text within images, and even set a self-timer for delayed captures. Additionally, it provides 10GB of storage for your screenshots, making it easy to organize and access your captures.
The subscription price for CleanShot X is $9.99 per month, but the advanced features it offers can be well worth the investment for those who frequently take and edit screenshots. Whether you need to capture full-page screenshots or add annotations, CleanShot X has you covered.
Snagit
Snagit is another excellent screenshot tool that goes beyond basic screen capture. It allows users to create videos from images, making it a versatile tool for tutorials and presentations. One of its standout features is the ability to perform scrolling captures, enabling you to capture entire webpages or long documents in one go.
Snagit also includes tools like Smart Move and Simplify, which make it easy to rearrange elements within screenshots and block out unwanted text. These features make Snagit a powerful tool for anyone looking to create professional and polished screenshots.
Capto
Capto is a versatile tool that combines screen recording, voiceover, and face recording features. It’s perfect for creating instructional videos or presentations, as it allows you to add voiceovers and record from the face camera. This makes it an all-in-one solution for both capturing and editing your screen content.
The subscription price for Capto is $9.99 per month, and its comprehensive features make it a valuable tool for anyone who needs to create detailed and professional screen recordings.
Tips and Tricks for Professional Screenshots
Taking professional screenshots requires more than just knowing the right shortcuts. It’s about capturing your screen in a way that clearly conveys the necessary information and looks polished. From avoiding extraneous details to annotating key points, there are several tips and tricks that can elevate your screenshots.
In this section, we’ll share some best practices for taking professional screenshots. You’ll learn how to use scrolling captures, add annotations, and crop and frame your screenshots to perfection.
Scrolling Screenshots
Scrolling screenshots are incredibly useful for capturing content that extends beyond the visible area of your screen. Tools like CleanShot X make it easy to capture entire webpages or long documents in one continuous screen shot. This is perfect for creating comprehensive reports or documentation.
Scrolling screenshots ensure all relevant information is captured in a single image, simplifying sharing and review.
Annotating Screenshots
Annotations can greatly enhance the clarity and effectiveness of your screenshots. By adding arrows, highlights, and text, you can guide viewers through the captured content and emphasize important details. This is particularly useful for tutorials, presentations, and any scenario where you need to explain something visually.
Use strategic placements and clear markings while annotating screenshots to convey your message effectively. Annotations should enhance, not clutter, the image.
Cropping and Framing
Cropping and framing are essential techniques for focusing on the most important parts of your screenshot. By removing unnecessary elements, you can highlight the key information and make your screenshot more visually appealing. Using grid lines can help maintain symmetry and balance in your cropped images.
Proper cropping and framing can make the difference between a cluttered screenshot and a professional-looking one that effectively communicates your message.
Managing and Editing Screenshots

Once you’ve taken your screenshots, managing and editing them effectively is crucial. From changing the default save location to editing in Preview, there are several ways to keep your screenshots organized and polished.
Managing and editing screenshots on a Mac involves several essential steps. You’ll learn how to customize save locations, perform basic edits in Preview, and share your screenshots with ease.
Changing Default Save Location
Open the Screenshot app and select the Options menu to customize the save location for your screenshots. From there, you can specify your desired folder or external drive as the save location. This ensures that your screenshots are automatically saved to a location that suits your workflow.
Changing the default save location can help you stay organized and make it easier to find your screenshots when you need them.
Editing Screenshots in Preview
Apple’s Preview app offers a range of editing tools for your screenshots. After capturing a screenshot, it automatically opens in Preview, allowing you to make immediate edits. You can crop, resize, annotate, and add text to your screenshots, making them more informative and visually appealing.
Editing in Preview is convenient and efficient, offering basic tools to polish your screenshots immediately after capturing them using an image editing program.
Sharing Screenshots
Sharing your mac screenshots is a breeze on a Mac. You can use Mail, Messages, AirDrop, or cloud services to quickly share your images. Additionally, you can customize your save location to make sharing even more seamless.
By integrating sharing options directly into your workflow, you can ensure that your screenshots reach their intended audience quickly and efficiently.
Troubleshooting Common Screenshot Issues
Even with all the right tools and techniques, you might encounter some issues with taking screenshots on a Mac. From screenshots not saving to keyboard shortcuts not working, these problems can be frustrating.
Common screenshot issues and their solutions will help you troubleshoot and resolve any problems. Whether it’s a configuration issue or a temporary glitch, we’ve got you covered.
Screenshots Not Saving
If screenshots are not saving, first confirm that your keyboard is responsive. Check for any shortcut configuration issues that might prevent screenshots from saving. By default, screenshots are saved to the Desktop, so if they’re not appearing there, try relaunching Finder or restarting your Mac.
If the problem persists, shutting down your Mac and turning it back on can often resolve the issue.
Keyboard Shortcuts Not Working
Non-functional keyboard shortcuts for screenshots can disrupt your workflow. First, make sure the keyboard shortcut for screenshots is enabled in your system settings. If it is, check for conflicting settings or permissions that might be causing the issue.
If the issue persists, restarting your Mac may resolve temporary problems affecting the keyboard shortcuts.

Summary
In conclusion, mastering how to screenshot on a Mac is a valuable skill that enhances your digital productivity and communication. From essential keyboard shortcuts like Shift + Command + 3 for capturing the entire screen to advanced tools and techniques, we’ve covered a comprehensive range of methods to help you take and manage your screenshots effectively.
By utilizing both built-in features and third-party tools, you can tailor your screenshot-taking process to fit your specific needs. Remember to apply the tips and tricks for professional-looking screenshots, and don’t hesitate to troubleshoot any issues you encounter. With these skills in your toolkit, you’re well-equipped to capture and share your screen like a pro.
Frequently Asked Questions
How do I capture a specific window on a Mac?
To capture a specific window on your Mac, just press Shift + Command + 4, hit the Space bar, and then click on the window you want to capture with the camera icon. It’s that simple!
Can I change where my screenshots are saved on my Mac?
Absolutely, you can change where your screenshots are saved on your Mac! Just open the Screenshot app, go to the Options menu, and select your preferred folder or external drive.
What should I do if my screenshots are not saving?
If your screenshots aren’t saving, make sure your keyboard is working and check your shortcut settings. Restarting Finder or your Mac can also do the trick!
How can I annotate my screenshots?
You can easily annotate your screenshots with tools like CleanShot X or the Preview app on your Mac by adding arrows, highlights, and text. It’s a straightforward way to enhance your images and communicate your ideas better!
What are some recommended third-party screenshot tools for Mac?
CleanShot X, Snagit, and Capto are great options for capturing and editing screenshots on your Mac. They each bring unique features that make your screenshotting experience much more efficient.

